
In this article, we will see step by step procedure to create mass allocation rules.
Consider a scenario where all the child department salary accounts(3001) related to the 00 departments have to be populated evenly
and this has to be done for each month.In this case, 00 is the parent department and 01, 02, 03 are child departments
Mass allocation rules for the above scenario can be created in the below way :
On navigating to GL Journals workspace, Chose the appropriate data access set under which we want to create the allocation rules.
From the Journals work area, click on Create Allocation rules.This will direct the user to EPM workspace
Follow the below paths which will display the calculation Manager :
Navigate - > Administer -> Calculation Manager
Now since the same kind of allocation has to be done every month, let's first create a run time prompt for Accounting period dimension member
Create a run time prompt variable as shown below.
Navigate to Tools - > Variables
Expand the Essbase, and select the essbase cube corresponding to your data access set,right click on the db, and click on create
Enter the name of the rule.And enter type as Member.Select the Dimension value and default value as "RDApr-14"
Now navigate back to the System View of the calculation manager, a balance cube is highlighted based on the user's current data access set.
Expand the db under the cube, right click on the row and select New from the menu.Enter the rule name and click OK button.
The newly created rule will be displayed in the new tab.Drag the allocation wizard from the rule palette and drag it between begin and end nodes in the rule designer:
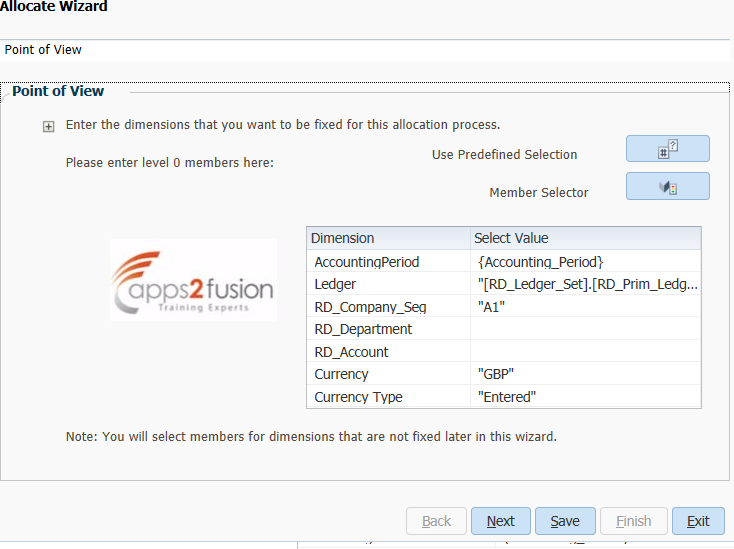
1.Double click on the Allocation Wizard. Enter the POV dimension member values as shown below.As mentioned earlier, those dimension member values that remain constant through out the allocation process will be specified here.
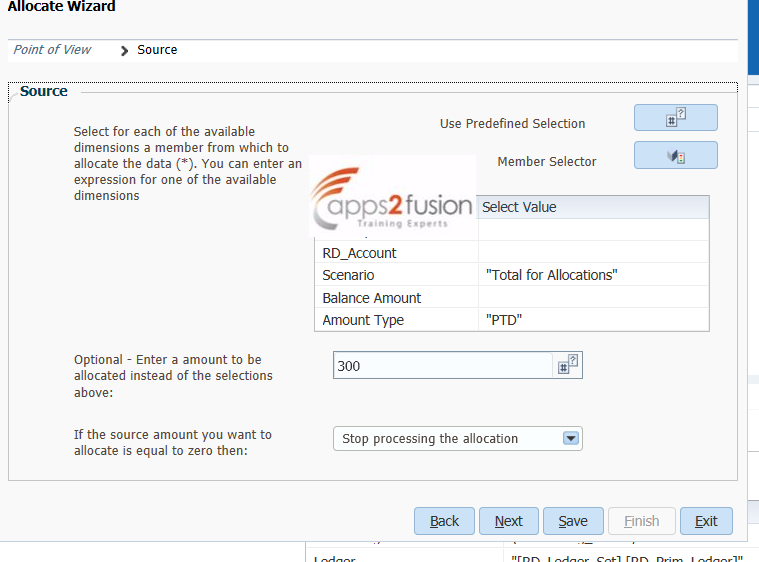
2.Enter the source dimension member values/just the amount that needs to be allocated
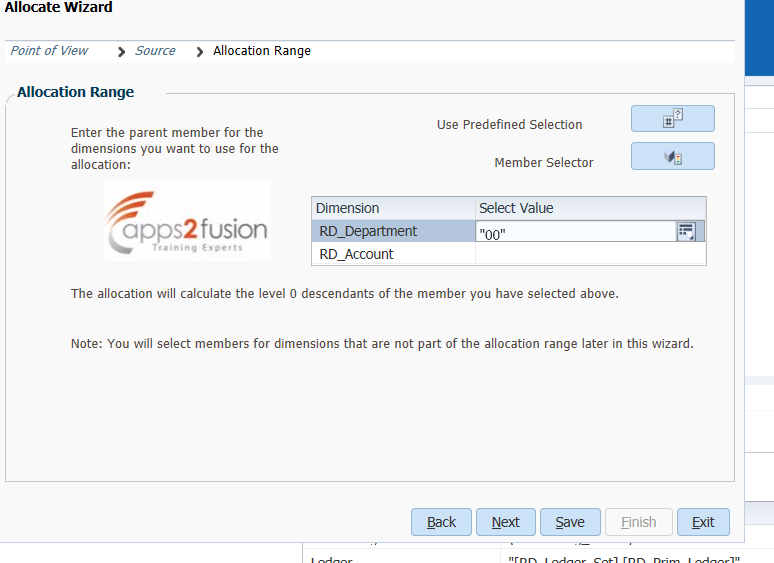
3.Enter the allocation range.i.e if we need to enter allocation journals to all the departments present under parent department then we will enter the parent department value here.
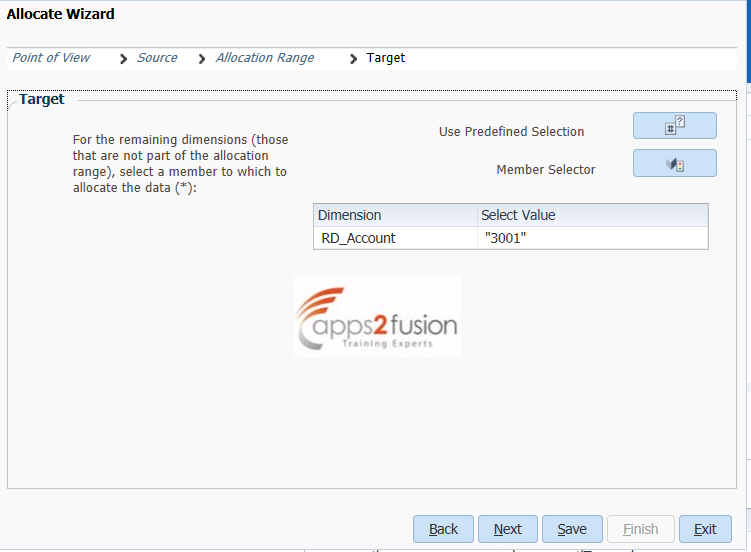
4. Enter the target dimension member values here.In this scenario, the account to which the journals are to be allocated for all the child departments can be specified here.
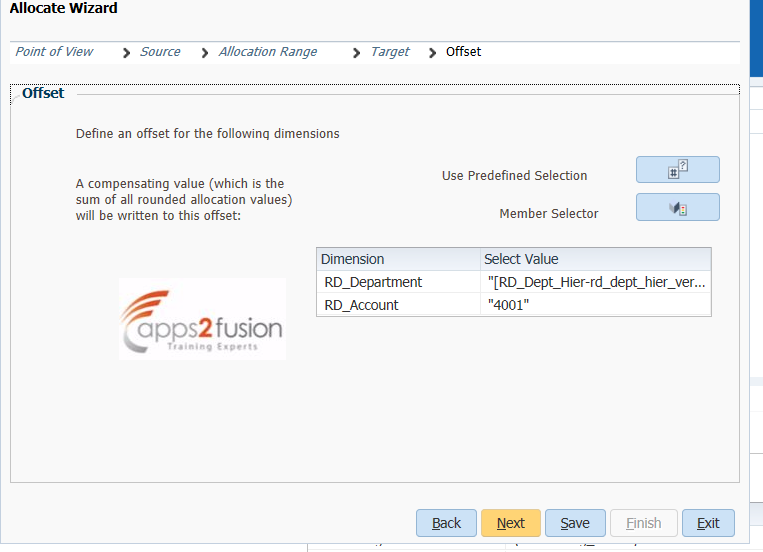
5.Enter the Offset member dimension member values as mentioned below
6. Enter the Exclude the dimension member values here.Let's say, we have a scenario where in all the child departments under the parent department needs to allocated but one department needs to excluded from this allocation process.Such kind of exceptions can be mentioned here.
7.Enter the basis, which is nothing but the basis on which the allocations are made.We can mention allocate evenly/specify a basis.Let's say we want to allocate journals based on the head count of each department, then the account dimension member values which represent the headcount will be given here
8. Enter the basis-options for evenly method based on your requirement.
9.Enter the rounding options, 'decimal places' - 2 and 'where to place the rounding difference' - Discard rounding error.
Click on finish.Save the rule, validate it and deploy it.
Once the deployment is successful, we can generate general ledger allocation based on this allocation rule.Navigate to Journals workarea and click on Generate General Ledger allocations.Select the newly created rule.As soon as this rule is selected, another field will be displayed which will ask us to enter accounting period(RTP for this rule) for which the allocations have to be generated.Check/Uncheck the Post allocations checkbox based on whether the generate allocation journals need reviewing before posting them.
On clicking Submit , the following processes will get submitted.We can check the outputs of these processes for the journal batch that got created.


