
Introduction of Interactive Grid in Apex 5.1:
Oracle Apex introduces an features of Interactive Grids that are both editable and read-only allowing a powerful component for a rich user experience.
It includes plenty of capabilities for changing how the data can be displayed and with few new options available in the Actions menu it also has the ability to rearrange the report interactively with a click of a mouse.
How to create the Interactive Grid:
Let’s take a closer look on how to create an interactive grid in Oracle Application Express
Step 1: Log in Oracle Application Express 5.1
Step 2: Click on the Application Builder Icon option

Step 3: Select any existing application from the available options OR Create a new Application if there isn’t any.
Step 3.1: If existing application, click on Create Page option

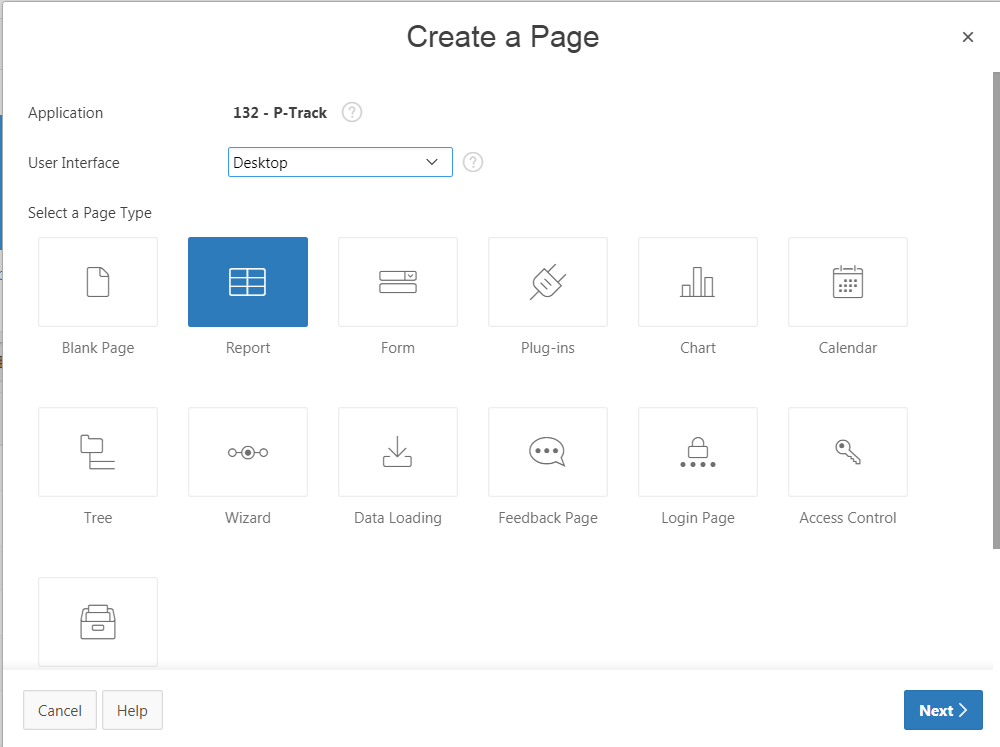
Step 3.1.1: Select Report, Select Interactive Grid, and click Next

Step 3.1.2: Enter Page Name: Demo IC then click Next
Step 3.1.3: Accept the default, then click Next
Step 3.1.4: Select Table Option, Schema → HR, Table Name → EMPLOYEES, Select all Columns in the Shuttle to the right button followed by Create

Step 3.1.5: On the Page, extreme right corner click the Run Icon to run the Page

Step 3.2: If no application exists then click Create → Desktop


Step 3.2.1: Enter Demo IG for Name, and click Next
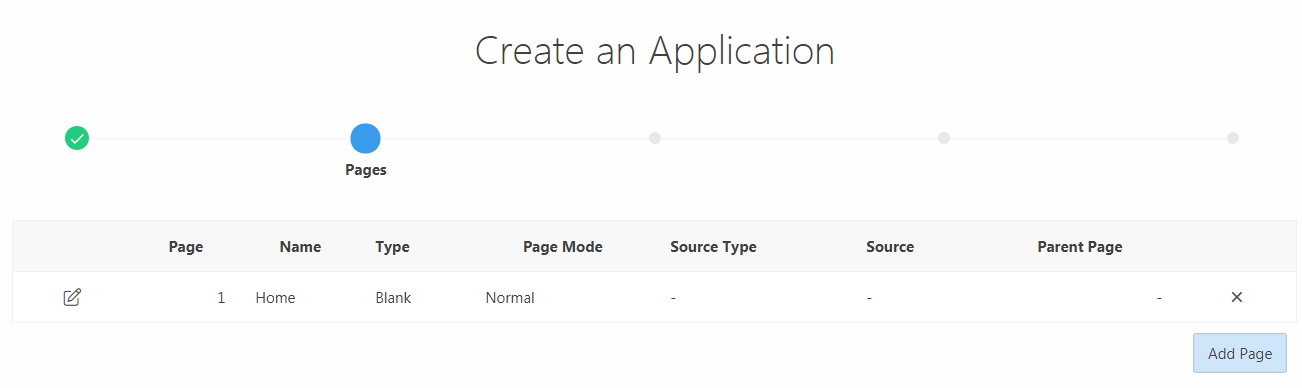
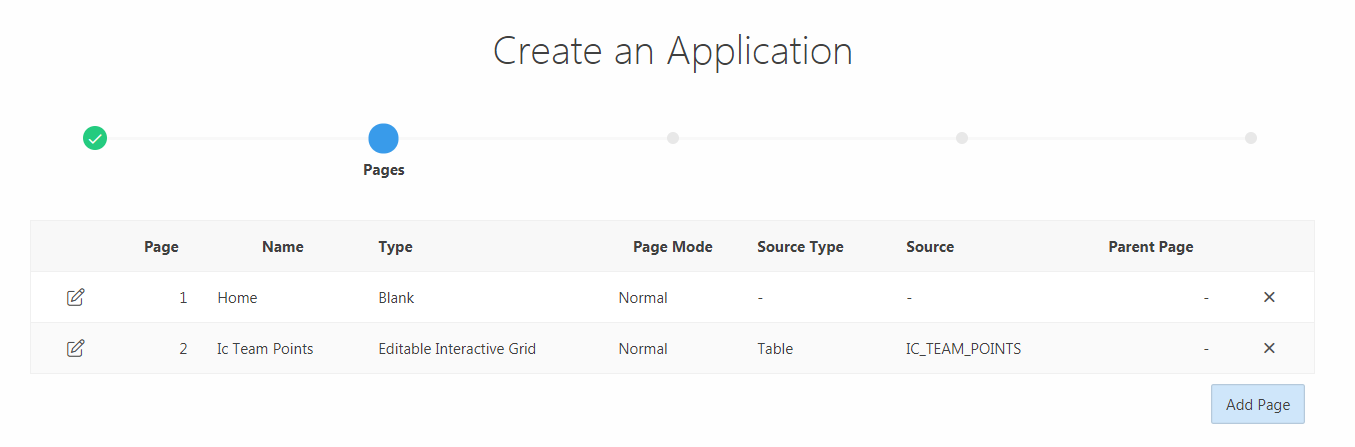
Step 3.2.2: By default, the Home page gets created. To add another page, click Add Page then click Next
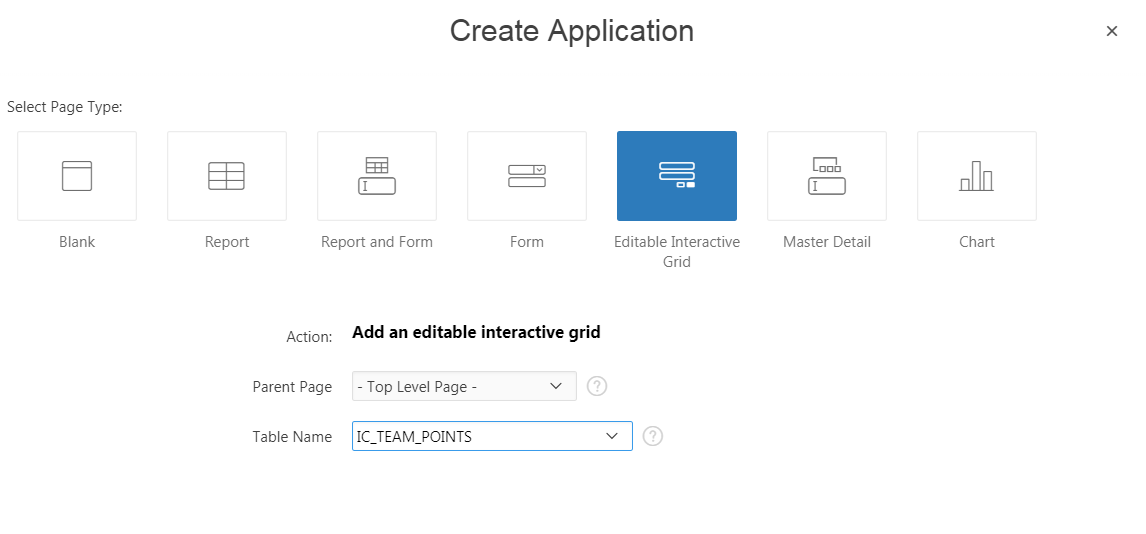
Step 3.2.3: Select Page Type → Editable Interactive Grid. Parent Page → Home(1), Page Source → Table, for Table Name → EMPLOYEES, and click the Add Page button followed by Next
Step 3.2.4: Accept the default, and click Next
Step 3.2.5: Accept the default, and click Next
Step 3.2.6: Review the Summary Page and click Create Application
Step 3.2.7: click Run Application
Step 4: On the Log On screen, enter your Apex credentials and click Log In.
Step 5: As the Home page application is displayed, you should be able to see the list containing employee records is displayed.
Step 6: On the Text Field of the Action Menu, you can search for values in the IG. Enter King in the search bar, and click Go.
Step 7: On result you would notice that only rows containing employees with First Name or Last Name as King is displayed on screen. This also creates an filter was just above the Interactive Grid data.
Step 8: To resize a column, you can click and hold the edge of a column heading and adjust it with the mouse. In this case, place your mouse at the edge of the Phone Number column and adjust the mouse to display the complete column heading
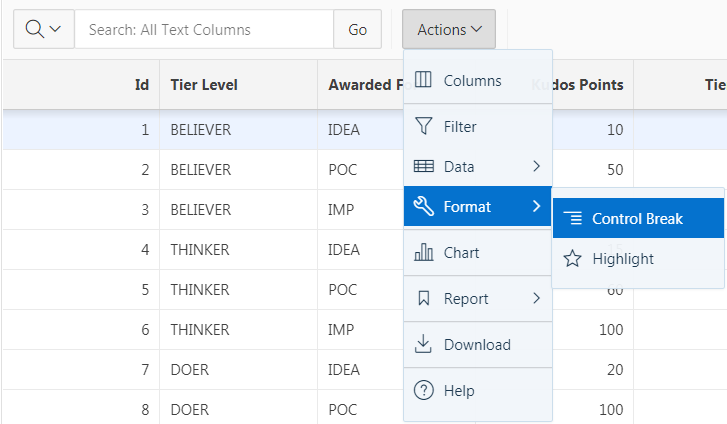
Step 9: Go ahead and create a control break on a column, for that select the Actions menu, select Format, and then select Control Break. Select column Job Id and click Save.
The control break is created. Notice the Job Id column is eliminated from the grid and now appears before each break point in the grid.
Step 10: To hide a column, you can select the column header and then click the Hide icon. In this case, click the Phone header, and select the Phone icon. Now you notice that the Phone column is no longer displayed in the grid. To view the column in the grid again, use the Columns option from the Actions menu

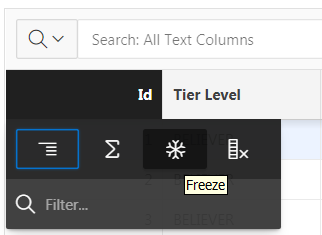
Step 11; To freeze a column, you can select the column header link and click the Freeze icon. Freezing a column excludes it from the scrollable area. Select the Email column heading and click Freeze
Scroll the page to your right, you see that the Email column is excluded from the scrollable area. Scroll back
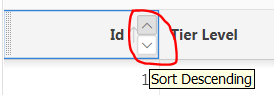
Step 12: To sort on a column, hover the mouse in the column heading you want to sort on and select the Sort Ascending or Sort Descending icon. Select the Last Name
column and select the Sort Ascending icon. The grid is now sorted on Last Name
Step 13: You can remove a filter by selecting the Remove Filter icon next the to filter or deselect a filter by unchecking the check box next to the filter. In this case, click the Remove Filter icon next to the filter
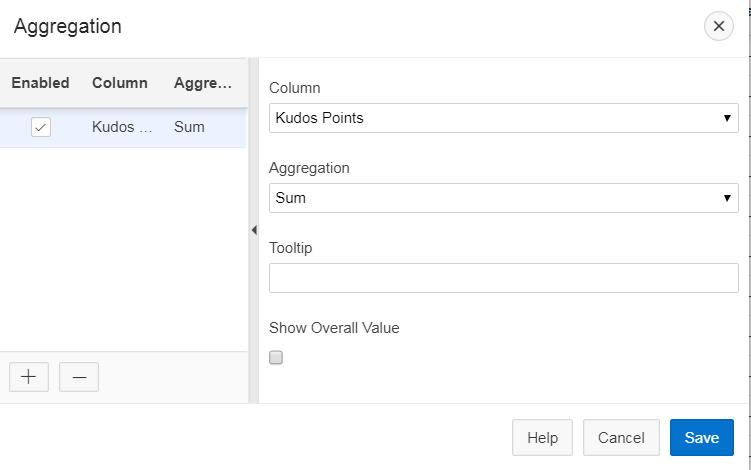
Step 14: To total the Salary, click the Salary header, and select the Aggregate icon. In the pop-up dialogue box, ensure that Salary is selected for Column, select Sum for Aggregation, and click Save
The grid displays total salary for each Job Id.
Step 15: To reorder columns, select the column you want to move, place your mouse pointer at the start of the column header, and drag the column to the desired location. Move the First Name column after Email
You see the First Name column is moved next to Email. Click the Reset button to revert all the changes you made to the grid
You see all the changes made to the grid is rolled back.


