Objective :
The objective of this article is to show how JMS Bridge is used to forward the message from one Queue to another .
What is a Messaging Bridge?
The WebLogic Messaging Bridge is a forwarding mechanism that provides interoperability between WebLogic JMS implementations, and between JMS and other messaging products.Use the Messaging Bridge to integrate your messaging applications between:
-Any two implementations of WebLogic JMS, including those from separate releases of WebLogic Server.
-WebLogic JMS implementations that reside in separate WebLogic domains.
-WebLogic JMS and a third-party JMS product (for example, MQSeries).
A messaging bridge instance forwards messages between a pair of bridge source and target destinations. These destinations are mapped to a pair of bridge source and target destinations. The messaging bridge reads messages from the source bridge destination and forwards those messages to the target bridge destination. For WebLogic JMS and third-party JMS products, a messaging bridge communicates with source and target destinations using the J2EE Connector Architecture
(JCA) resource adapters provided with WebLogic Server.
Steps to create JMS Bridge
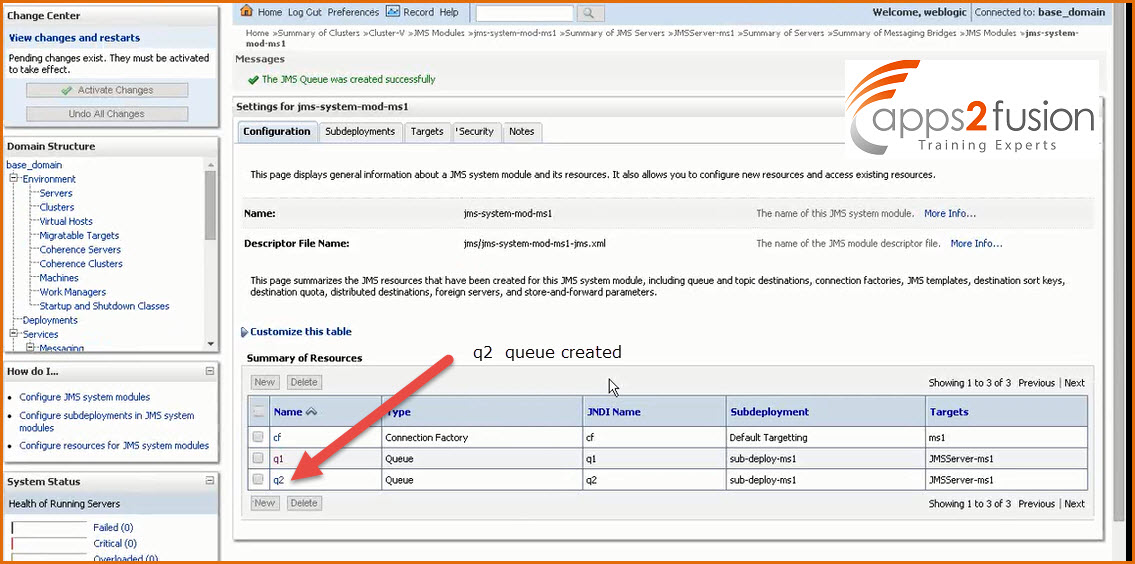
-->First we will create one more queue q2.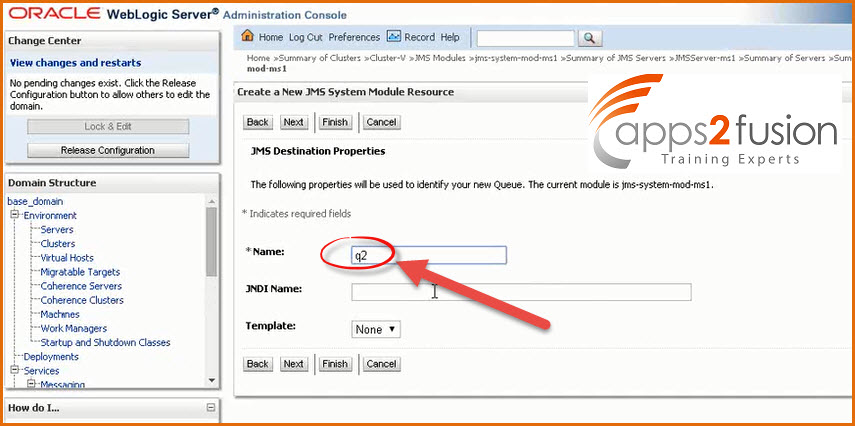
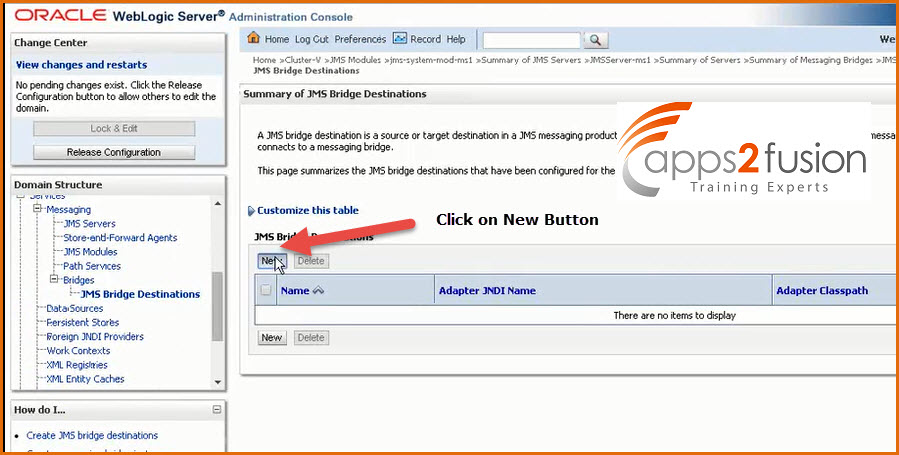
1.Click on Bridges>JMS Bridge Destinations to create the Source Destination 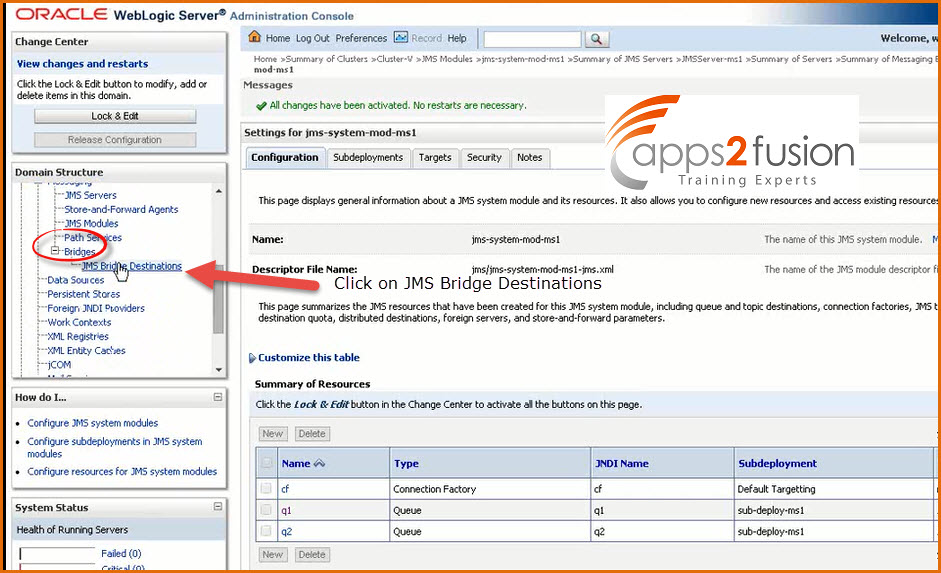
2.Click on Lock & Edit>New
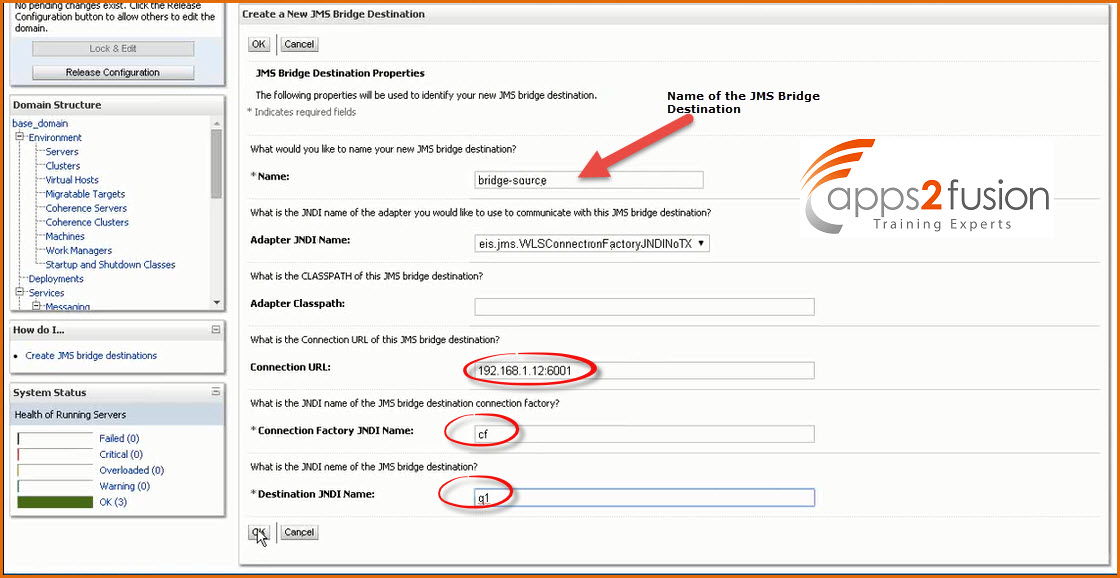
3. Give Name : bridge-source
Connection Factory JNDI Name : cf
Connection URL : 192.168.1.12:6001
Destination JNDI Name : q1
Click OK
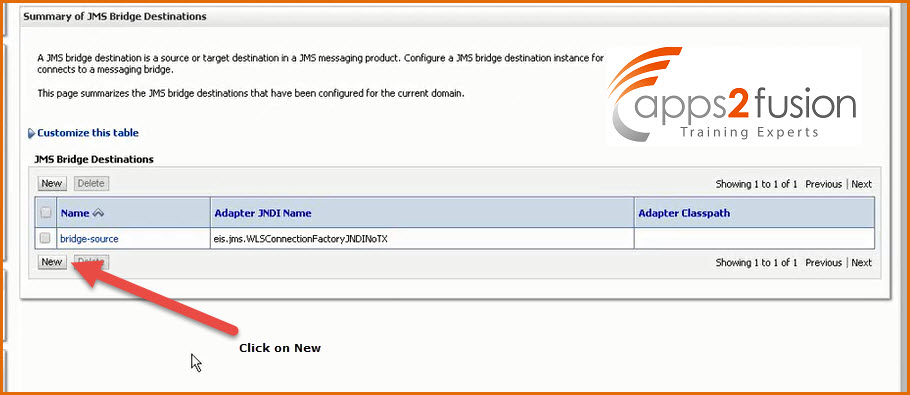
4. JMS Bridge Source Destination will be created 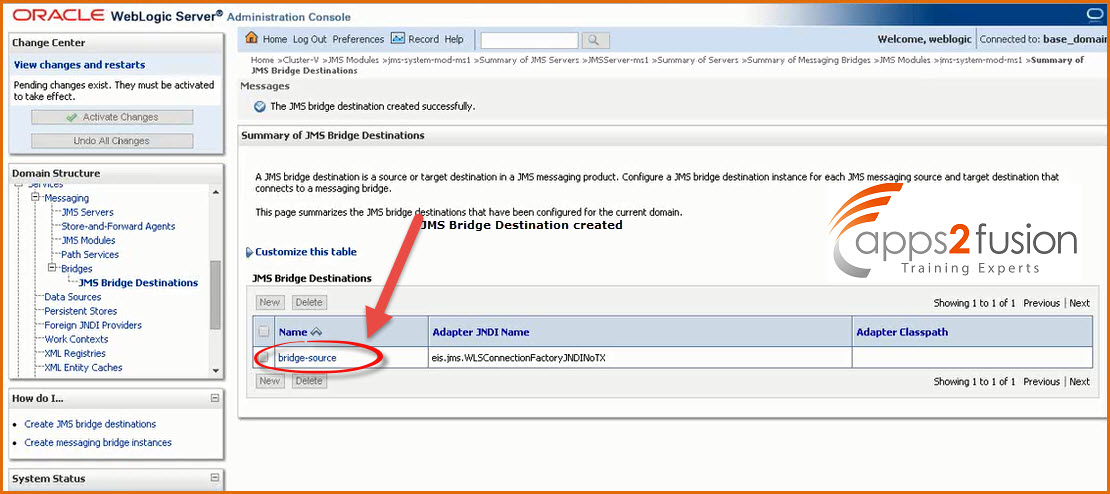
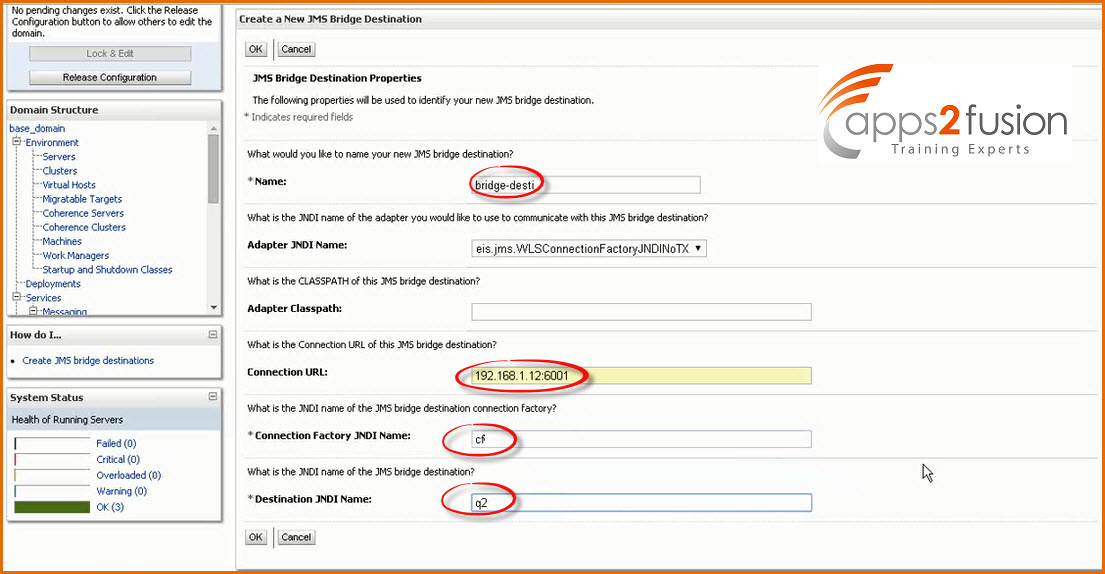
5. Click on New
6. Give Name : bridge-desti
Connection Factory JNDI Name : cf
Connection URL : 192.168.1.12:6001
Destination JNDI Name : q2
Click OK
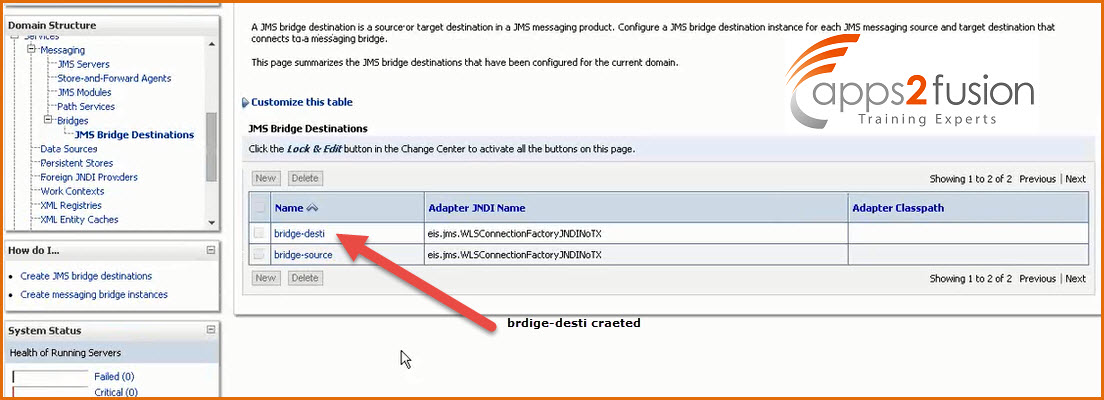
Now our source and destination are ready .
7. Now we will create bridge . To create bridge Click on Bridge>New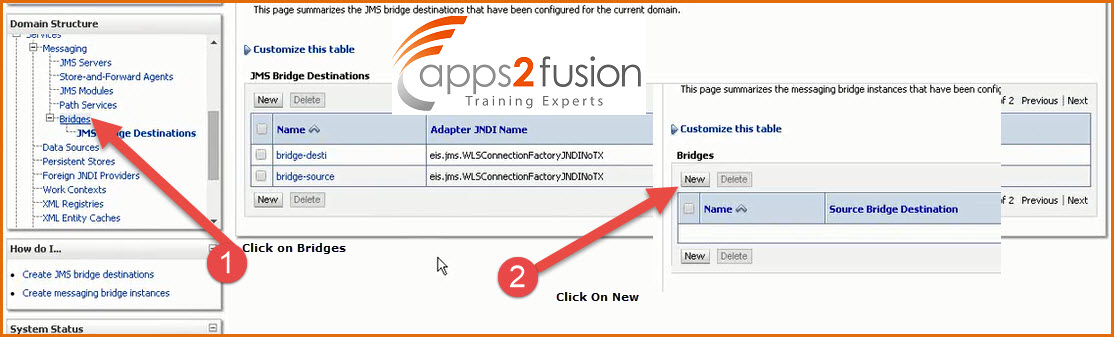
8. Give Name: Bridge-1
Quality Of Service : Exactly-once
Click On Next 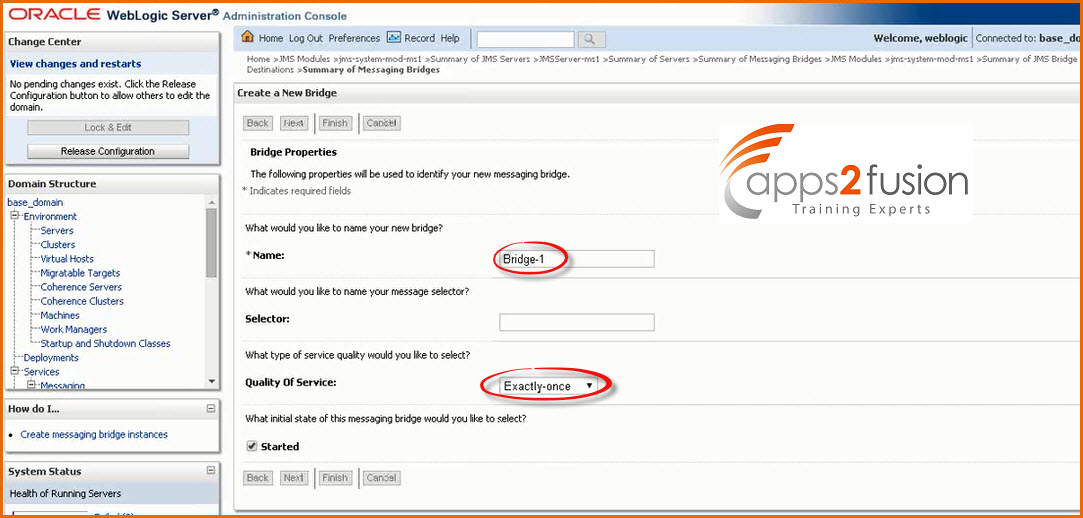
9. Select the Source Destination which we already created and Click Next 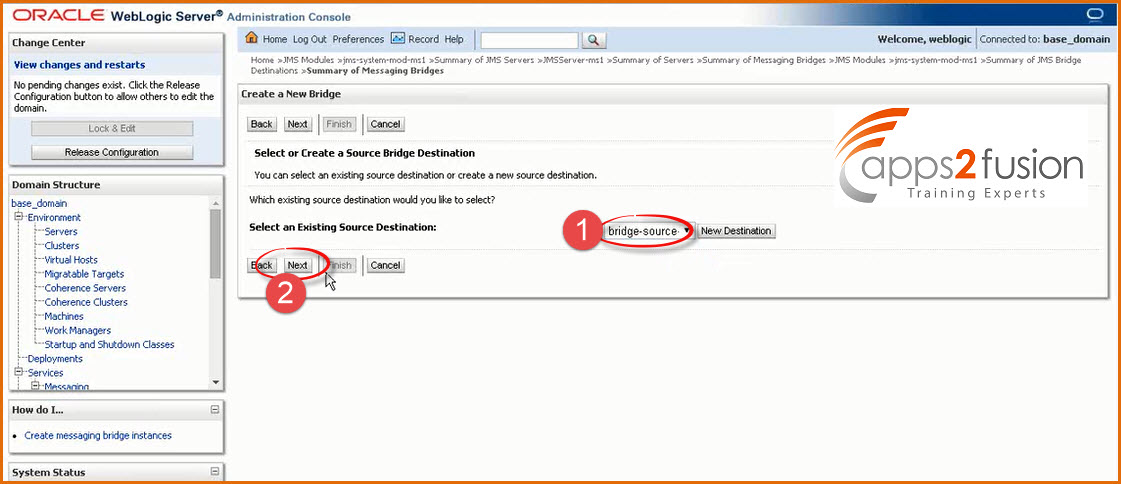
--> Select the Message Provider : WebLogic Server 7.0 and above . & Click on Next 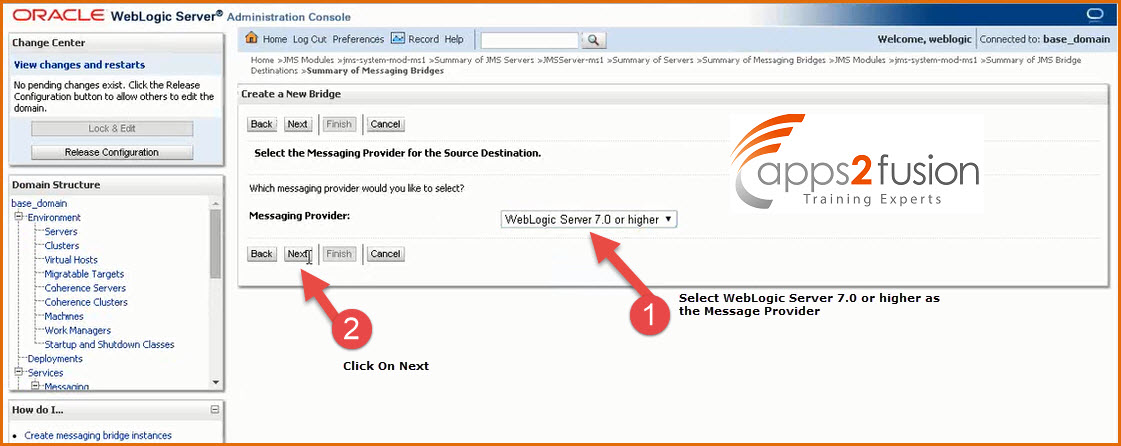
10. Now select the Target Destination which we already created and Click Next 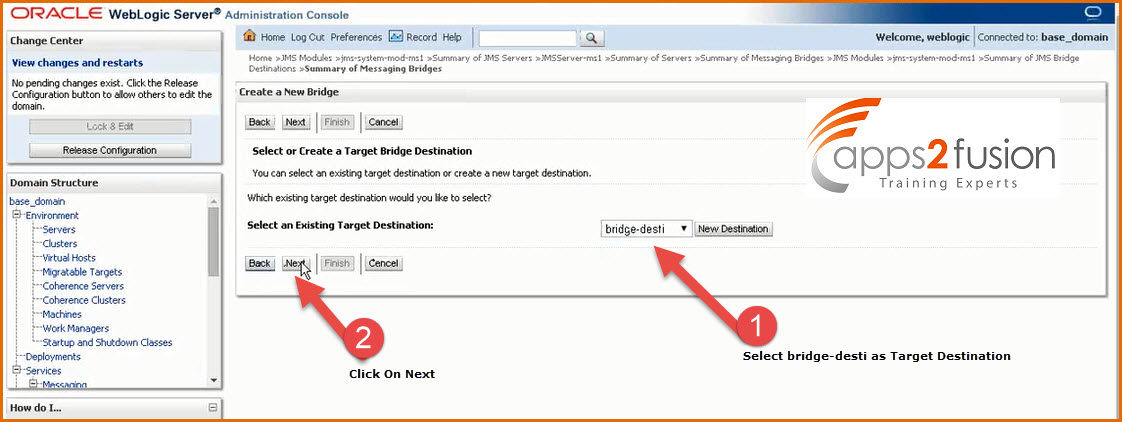
--> Select the Message Provider : WebLogic Server 7.0 and above . & Click on Next
11. We will target the bridge on ms1 managed server which is the part of cluster . So we will select ms1 as the bridge's target and click on Next 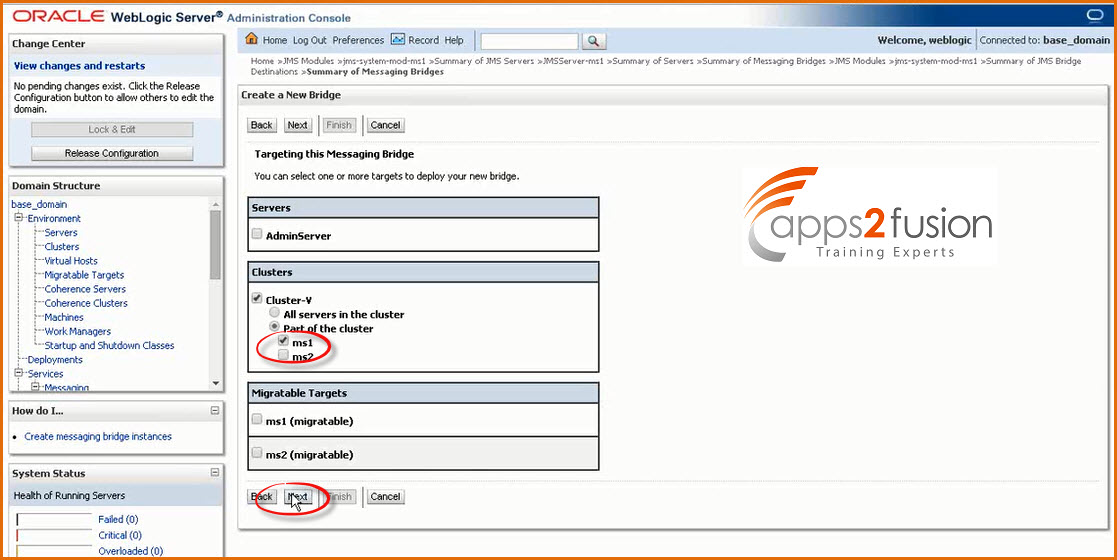
Click on Finish & Activate Changes (Bridge will be created )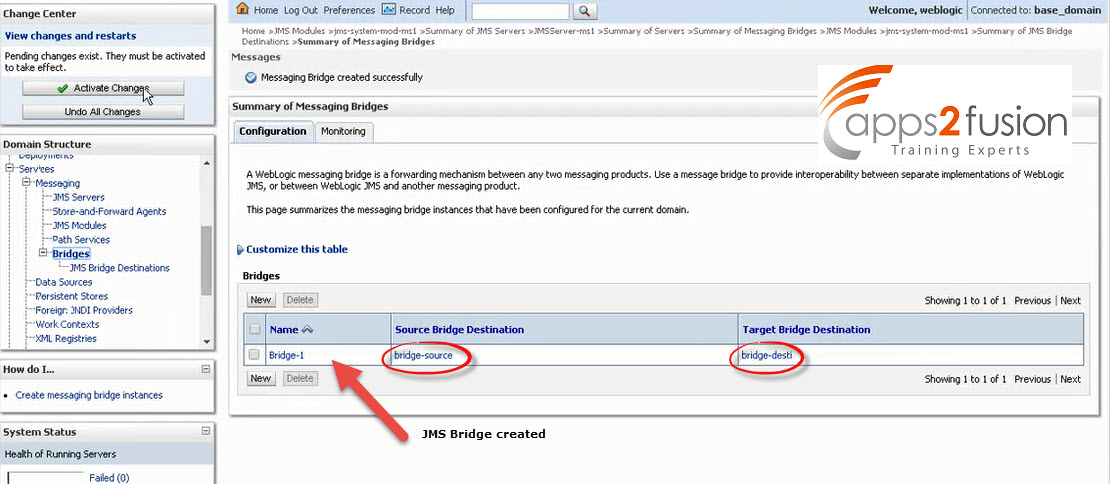
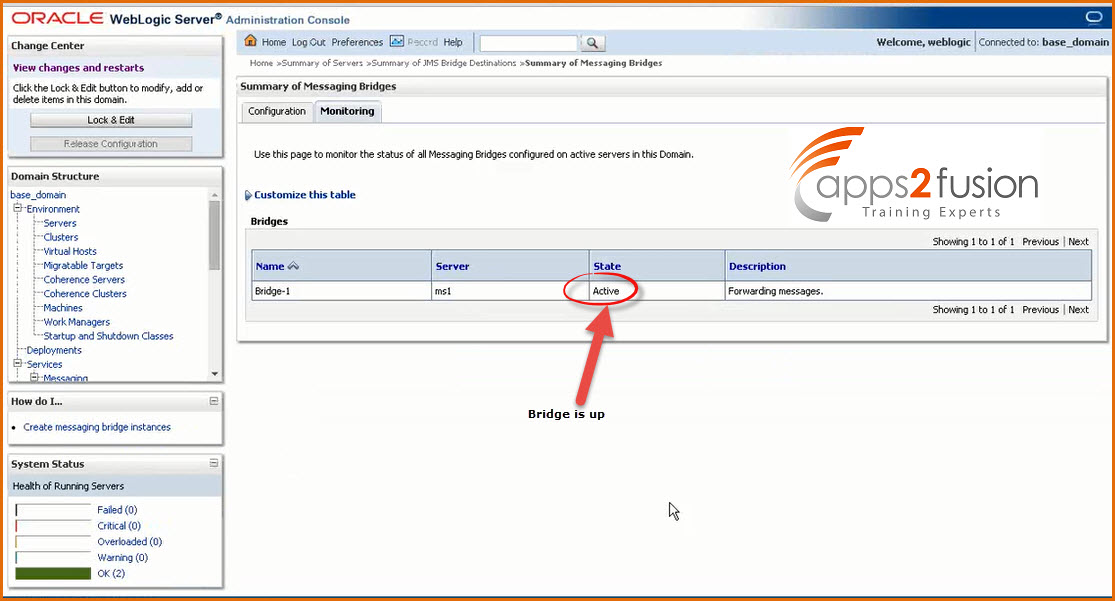
11. Click on Monitoring
If there is a warning : failed to connect to the source , then we have missed the username and pasword for the source .
-->So go in source configuration and enter the user name and password .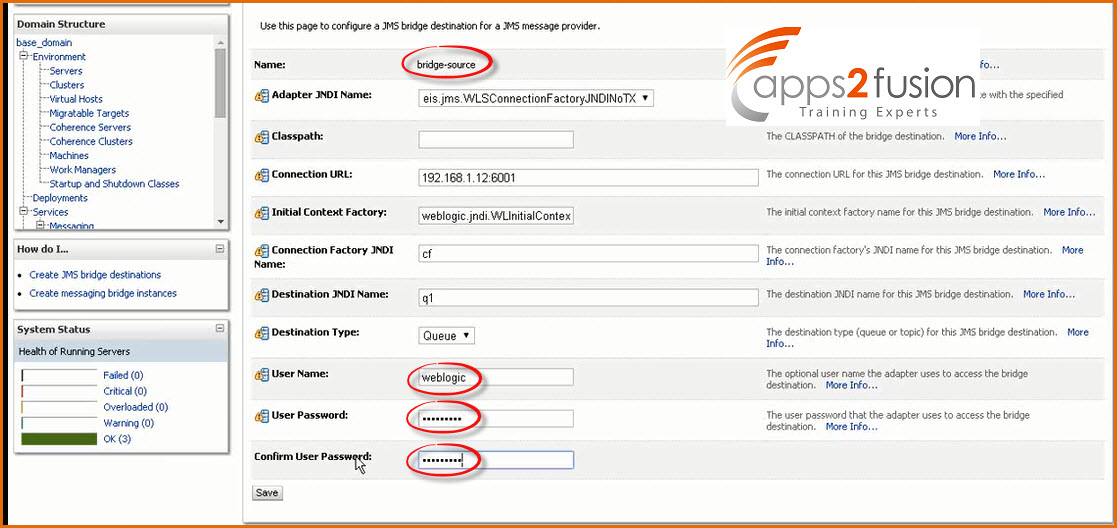
Similarly you need to do the changes for the destination also .
Also shut down ms1 forcefully and then restart . And then check whether the bridge is up .
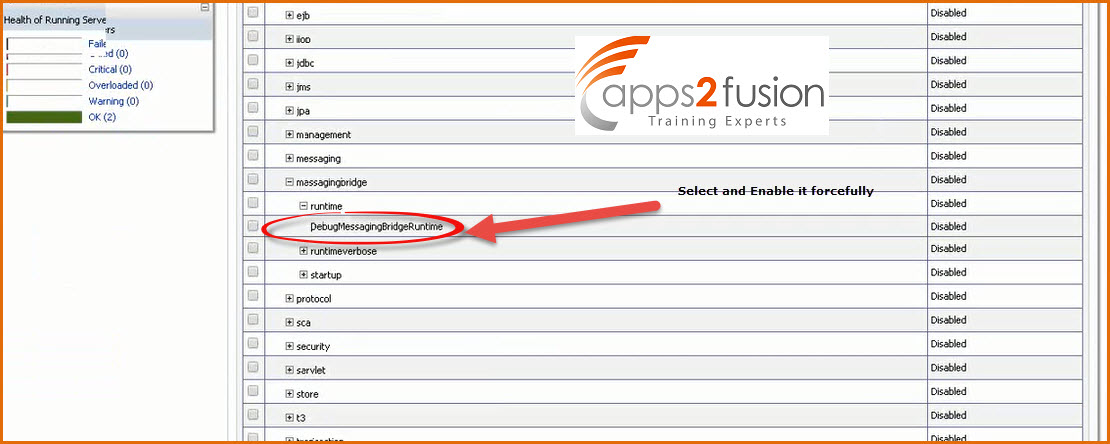
-->Go to Managed Server ms1 Debug Tab
-->Click on Weblogic
-->Select messagingbridge > runtime> startup >DebugMessagingBridgeStartup and enable it
Now go to logging tab & Click Lock & Edit
-->Check the Redirect stdout logging enabled and Redirect stderr logging enabled option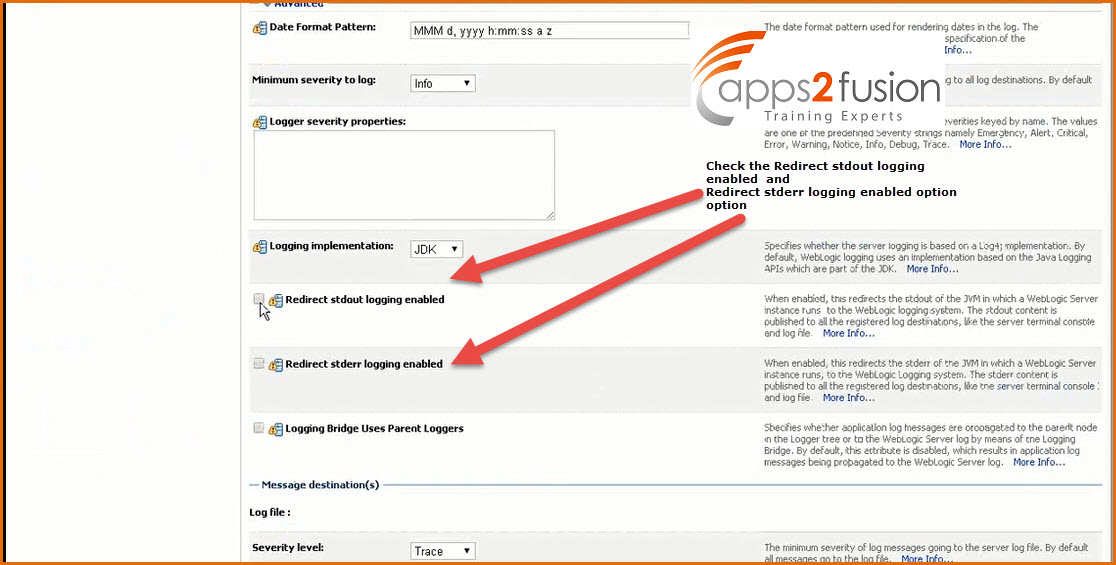
-->Click on source configuration and edit Connection URL from 192.169.1.12:6001 to http://192.169.1.12:6001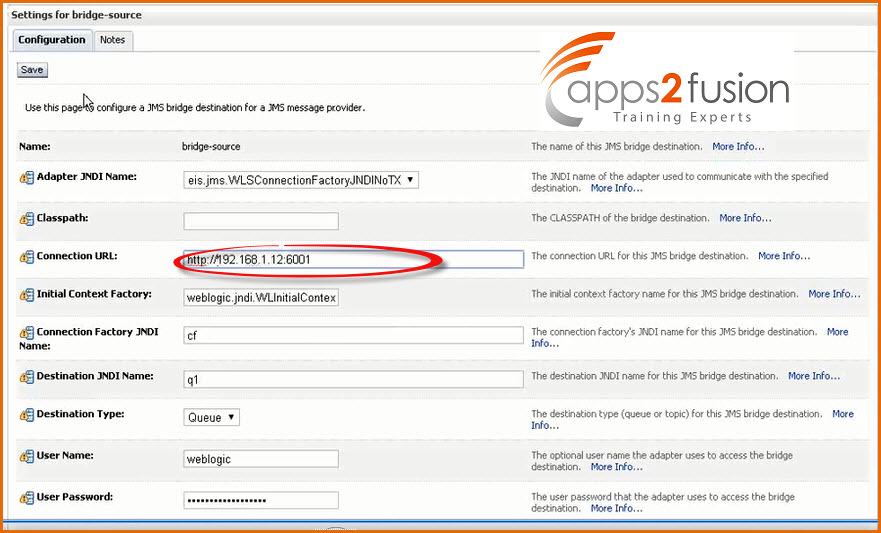
-->Similarly do the changes for destination .
Now finally the bridge will be active
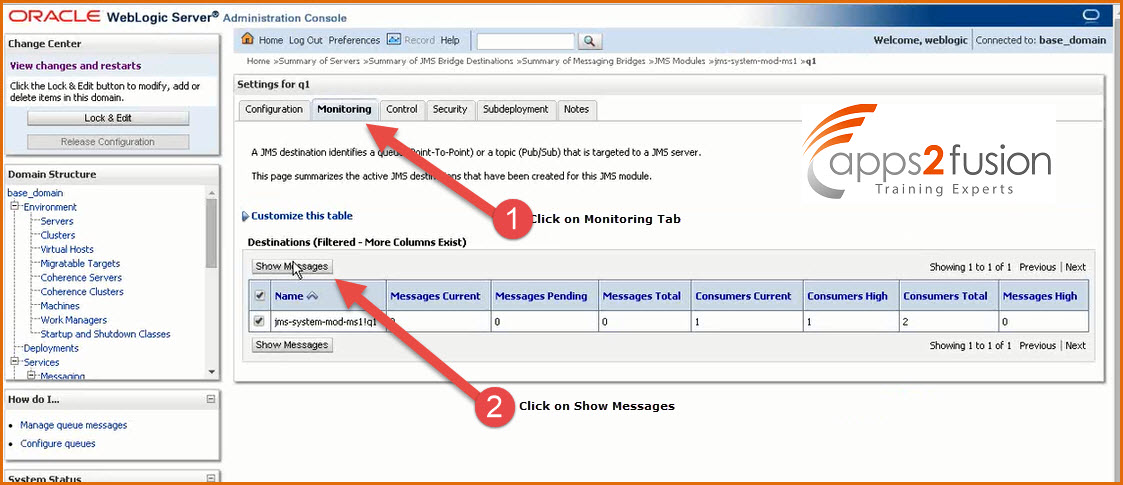
12. Click on JMS Modules>jms-system-mod-ms1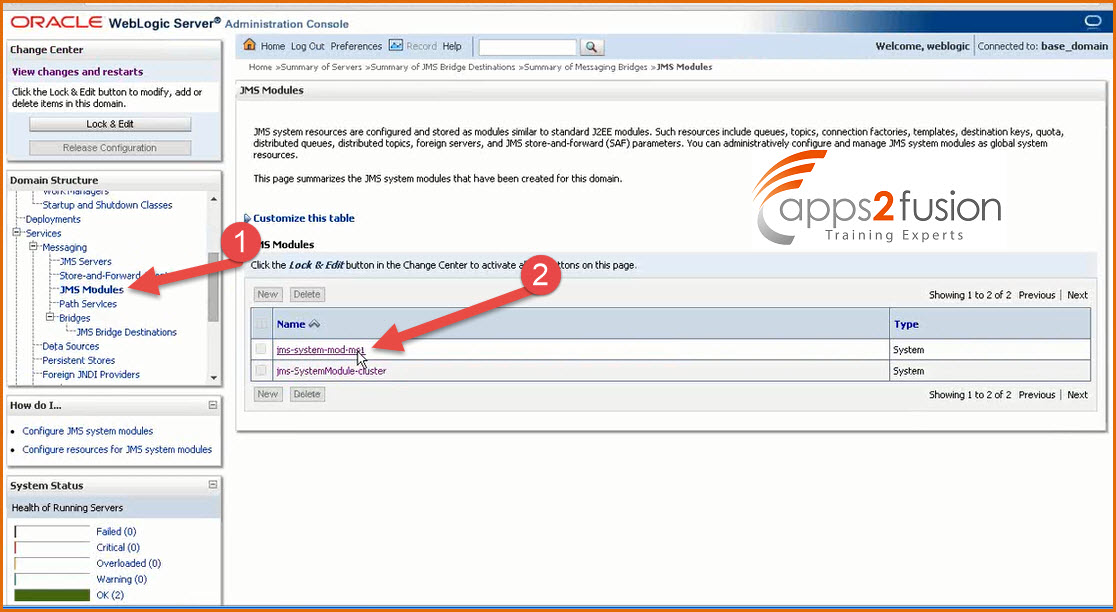
--> Click on q1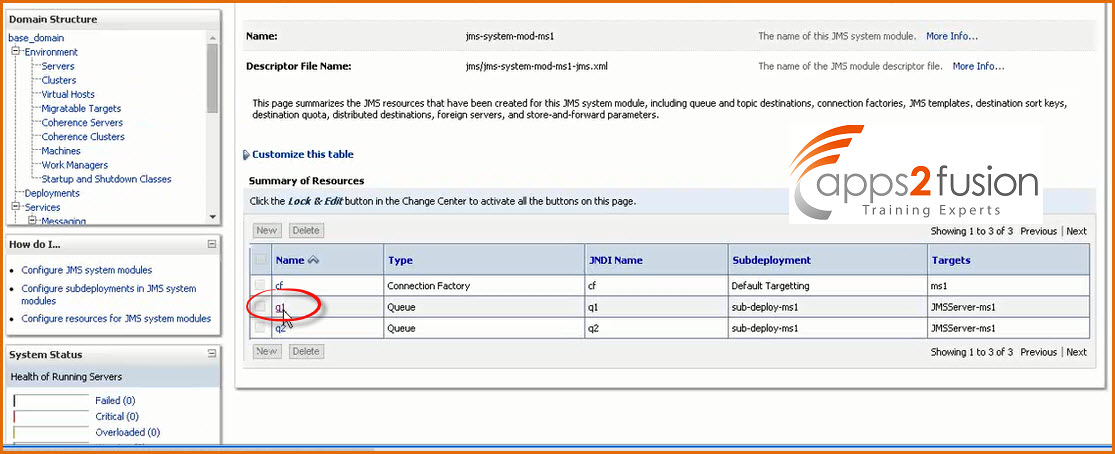
Click on Monitoring>ShowMessages
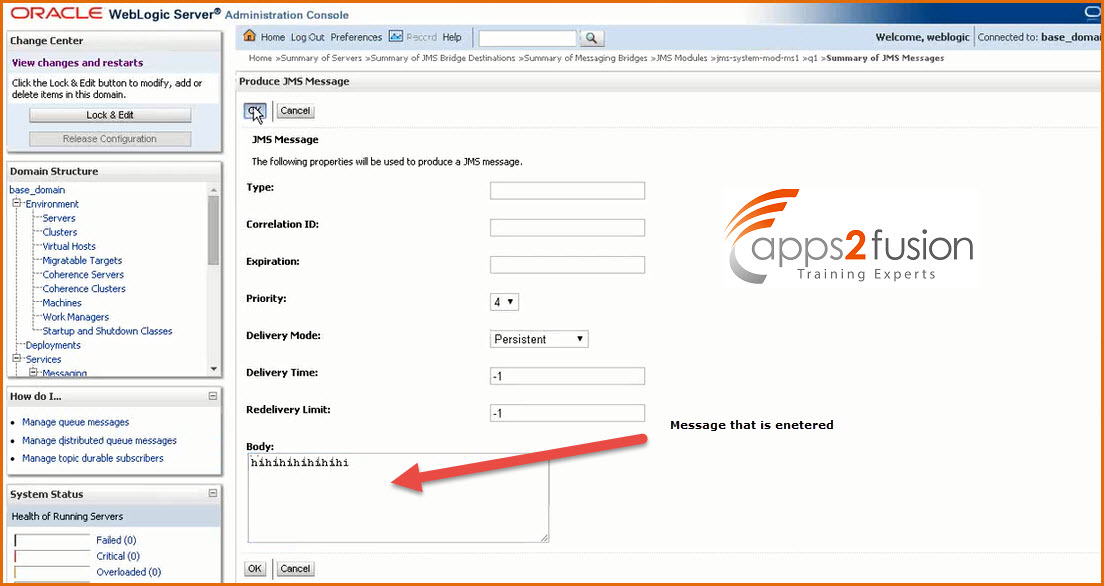
--> You will see that there is a option to send the message from WLS console also .
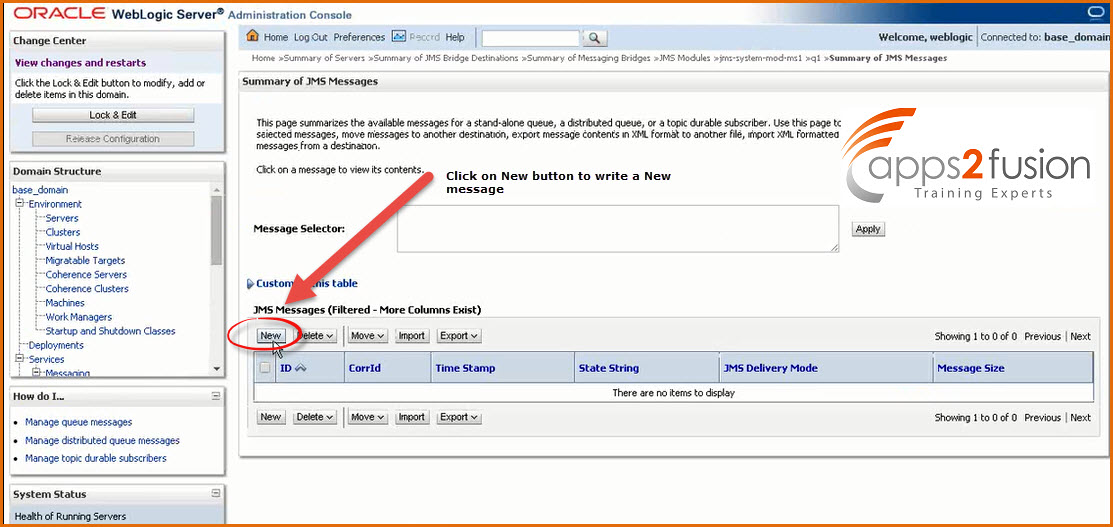
--> Enter the message and click on ok .
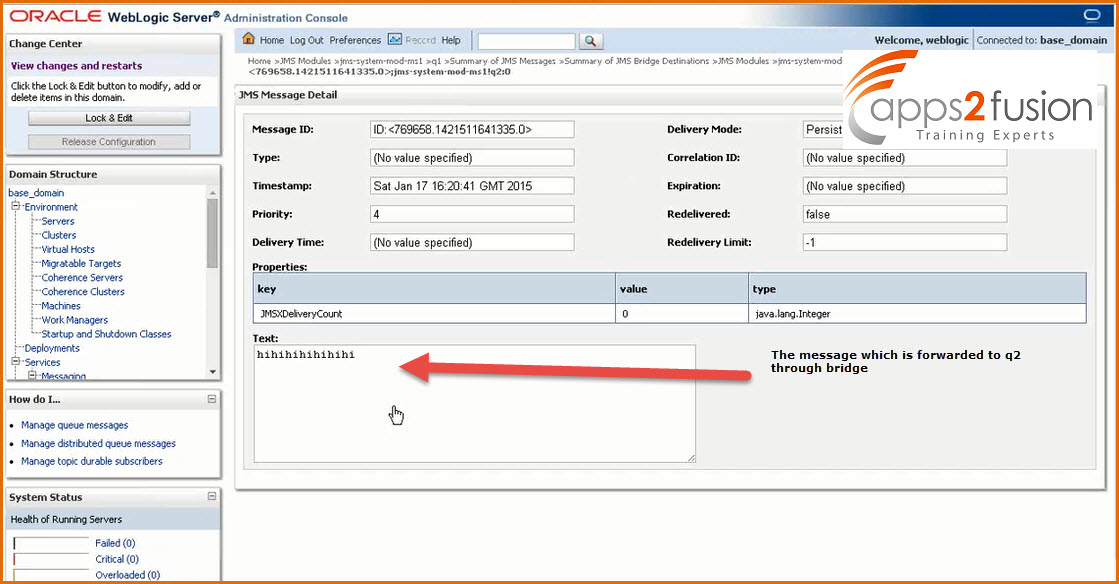
13. Click on JMS Module>jms-system-mod-ms1>q2 ( In order to check whether the message we entered is forwarded to q2 or not for which had created the bridge )
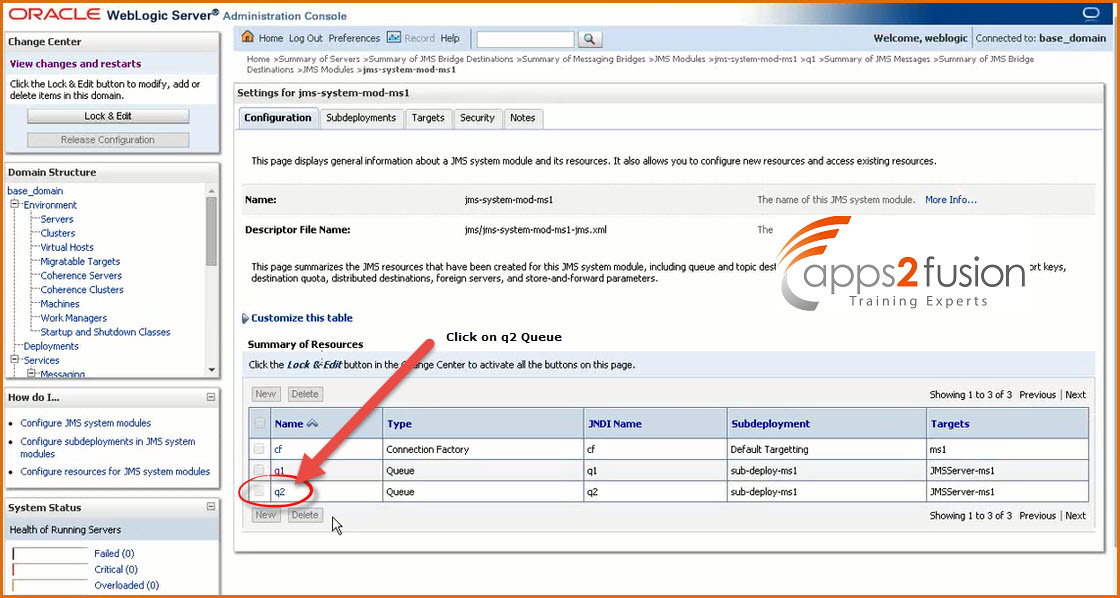
--> Then click on Monitoring tab > Show Messages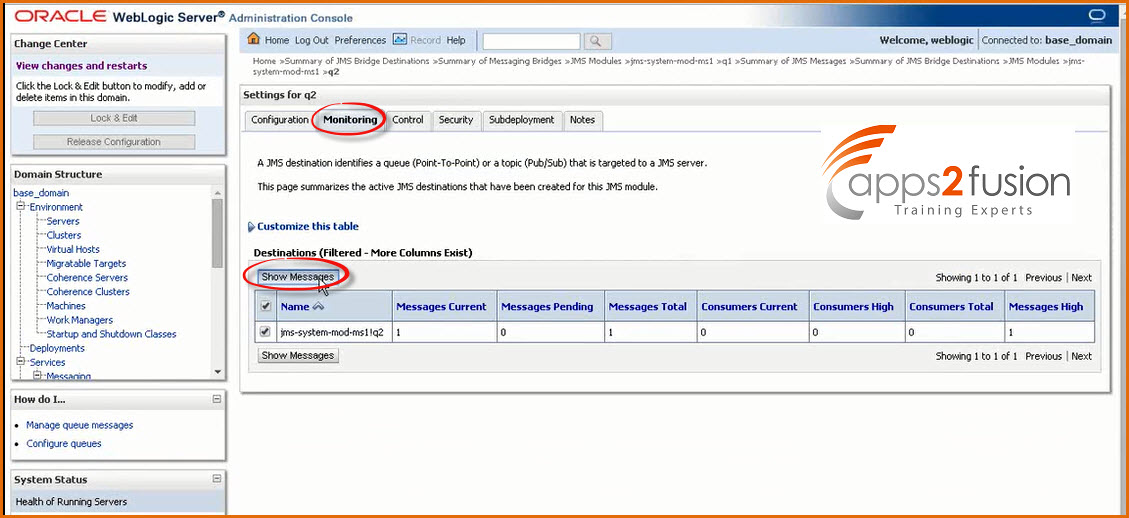
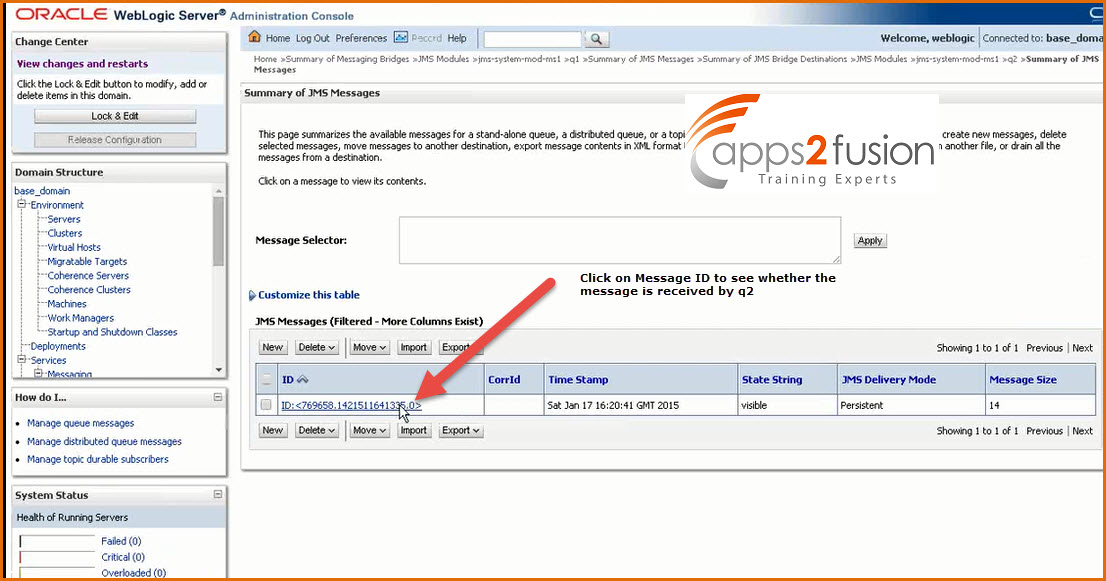
You will see that the message is seen which q2 received which was the purpose of our JMS Bridge in this article .