
This tutorial deals with Fusion Payroll, and how it functions. In this part, we will discuss the UIs related to Payroll Processes, Payroll Process Results, and Person Process Results.
Payroll Processes
As discussed in the previous part of the tutorial, there are specific processes available at the specific work areas. Depending on the work area’s functionality, it would have the specific payroll processes related to it.
Note: For the following steps to be executed, payment methods have to be set up. This has already been discussed in the earlier tutorials, ‘Oracle Fusion Payroll - Payment Methods (Part 1),’ ‘Oracle Fusion Payroll - Payment Methods (Part 2),’ and ‘Oracle Fusion Payroll - Payment Methods (Part 3).’
The Make EFT Payments Process
After the prepayments are calculated, depending on the payment method set up for the employee, the appropriate payment process has to be run. To generate checks, the Generate Check Payments process is used. For making EFT payments, the Make EFT Payments is used.
To create a Make EFT Payments process, follow the below steps:
-
Click on the Navigator icon. Go to Payroll -> Payment Distribution to go to the Payment Distribution work area.
-
Click on Submit a Process or Report under Payroll Flows from the task list on the left.
-
Select the Legislative Data Group from the dropdown.
-
Search for and select the Make EFT Payments process and click on the Next button on the top right-hand corner.
-
Enter the Payroll Flow name. Select the Payroll using the magnifying glass icon.
-
Select the Process Start Date and Process End Date and click on the Next button.
-
Search and select the Organisation Payment Method.
-
Enter flow interactions (if any) and click on the Next button.
-
Select a schedule for the payroll flow and click on the Next button.
-
Review the details of the payroll flow and click on the Submit button.

Fig. 1 - The Make EFT Payments process
The Roll Back Process
The Roll Back process is an important process that is used in the case of any errors being present in the payroll execution. If you are not satisfied with a particular payroll process execution, or if you have detected any errors present in a process that has been executed, the roll back process can be used.
To create a Roll Back Process, follow the below steps:
-
Click on the Navigator icon (shown in the screenshot below). Go to Payroll -> Payroll Calculations to go to the Payroll Calculations work area.
-
Click on Submit a Process or Report under Payroll Flows from the task list on the left.
-
Select the Legislative Data Group from the dropdown.
-
Select Roll Back Process and click on the Next button on the top right-hand corner.
-
Enter a name for the flow.
-
Click on the magnifying glass icon to search and select a payroll process. Click on the process name from the search results.
-
Click on the Next button.
-
Add a flow interaction (if any) by clicking on the Add icon.
-
Click on the Next button.
-
Select a schedule for the payroll process to run. If you want the process to run immediately, select As soon as possible. Or if you want to pick a specific schedule, use the Using a schedule option. You can select either Once, a schedule formula, Weekly, Daily, or Monthly. For the weekly, daily, and monthly options, you have to select a start and end date.
-
Click on the Next button.
-
Review the details of the payroll process and click on the Submit button.

Fig. 2 - Selecting a process
Payroll and Person Process Results
After submitting the process(es), to view the Person Process Results, follow the below steps:
-
Go to the Payroll Calculation work area from the Navigator menu.
-
Click on View Person Process Results under Process Results from the task list on the left. Search for your Payroll Process Flow Name.
-
Click on a Payroll Process Flow Name from the search results to view its person processing status.
-
Click on the bar graph to view the persons processed by the flow.
-
By clicking the name of a person, you can view their Person Process Results that include the Statement of Earnings, Earnings, Deductions, etc. of that person.
-
To add or remove any of the details, click on the Control Details button to the top right-hand corner of the Quick Reference Summary section. You can use the arrow buttons to add and remove any details that are available.
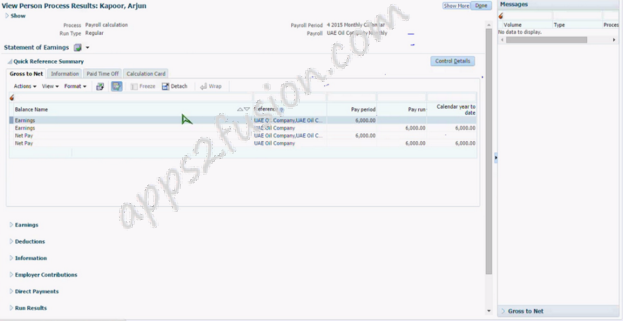
Fig. 3 - Person Process Results of the person ‘Kapoor, Arjun’
To view the Payroll Process Results, follow the below steps:
-
Go to the Payroll Distribution work area from the Navigator menu.
-
Click on View Payroll Process Results under Process Results from the task list on the left.
-
Search for your Payroll Name and click on the search result.
-
Click on the Search button and click on a name from the search results.
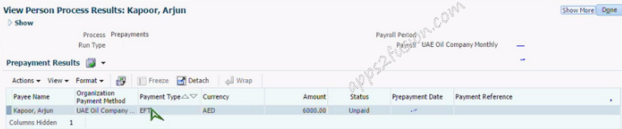
Fig. 4 - Person Process Results of ‘Kapoor, Arjun’ for Prepayments process


