
Objective :
In this article we will learn using Oracle Identity Manager System Administration Console interface & creating IT Resources .
System Admin Console :
The Oracle Identity Manager System Administration Console interface has been designed to adhere to the standards set in Section 508 of the Rehabilitation Act and the World Wide Web Consortium's Web Content Accessibility Guidelines 2.0 AA (WCAG 2.0 'AA").
To log in to Oracle Identity Manager System Administration Console:
1. Browse to the following URL by using a Web browser:
http:localhost:14000/sysadmin (http://HOSTNAME:PORT/sysadmin)
In this URL, HOSTNAME represents the name of the computer hosting the application server and PORT refers to the port on which the server is listening.
2. After the Oracle Identity Manager System Administration Console login page is displayed, log in with your user name and password.
3. For integrating new application , scheduling new task ,and other system administration we will use System Admin Console . If we try to login using normal user we will get error that you dont have access to Sysadmin application .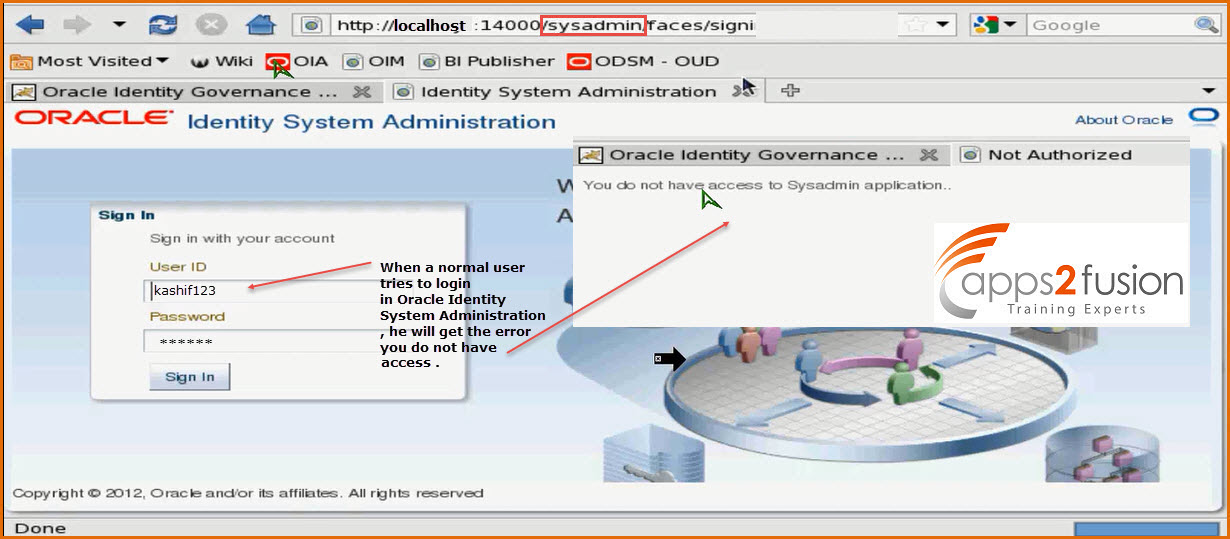
Since we have not asigned the user privilege to manage the system administration , so it will take the user to Oracle Identity Self Service Control after some time . 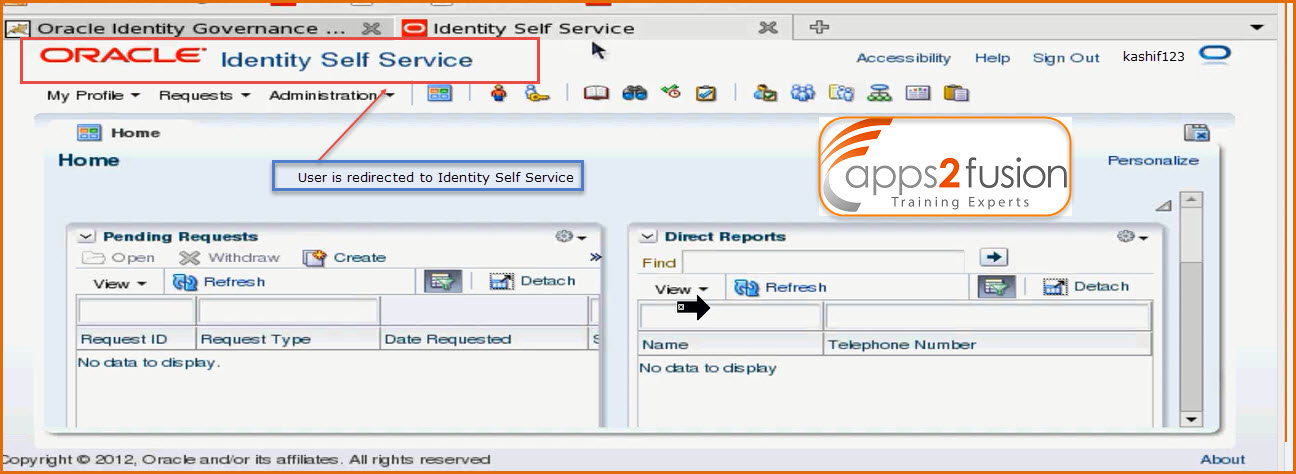
4. Now we will logout from normal user and login as administrator . 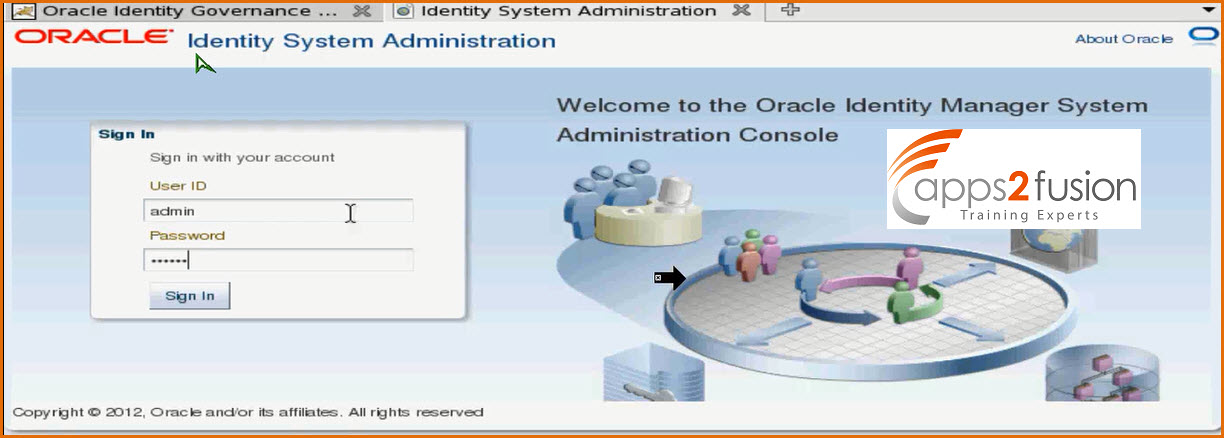
So now admin can create Approval Policies , Access Policies etc all the administration related tasks . Its not user specific .
5. Click On System Management>Scheduler
Advanced Search for *cat* in order to search for Catalog Synchronization 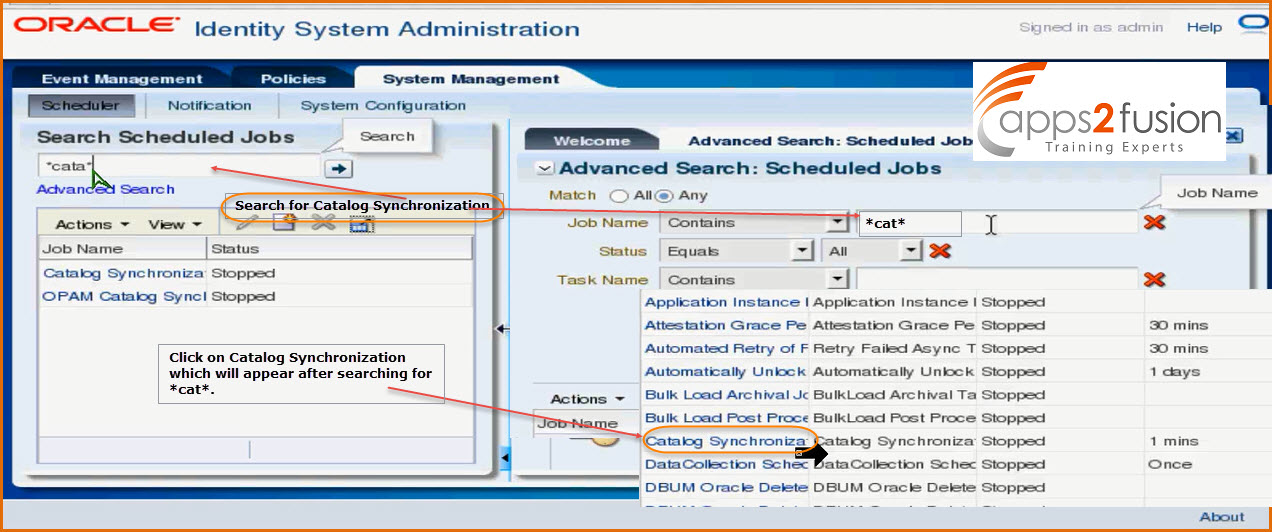
Since Catalog Synchronization Job is run every 1 minute we were able to see the role Project7 (discussed in previous article about roles ) immediatley after we created. If the role is not reflecting then manually you need to run this job . So any custom Jobs can also be created by the administrator . There are two consoles 1)Identity Self Service Console / User Console and 2)System Admin Console .
6. Now we will try creating an IT resource .
To create an IT resource Click Configuration>IT Resource 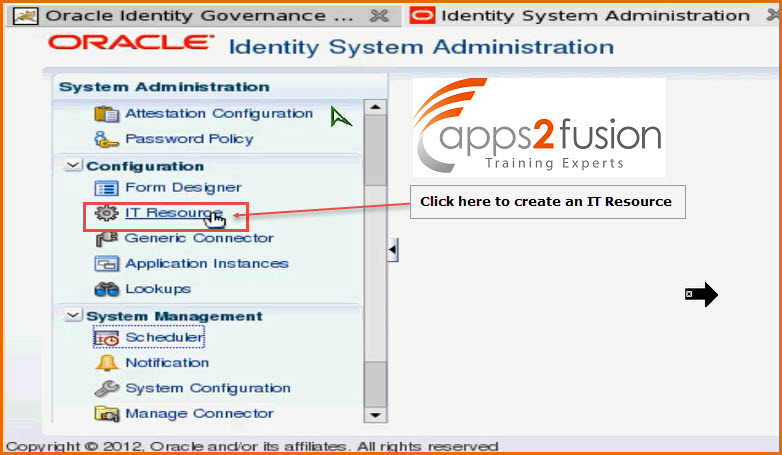
7. It will ask you to select the IT resource you want to create 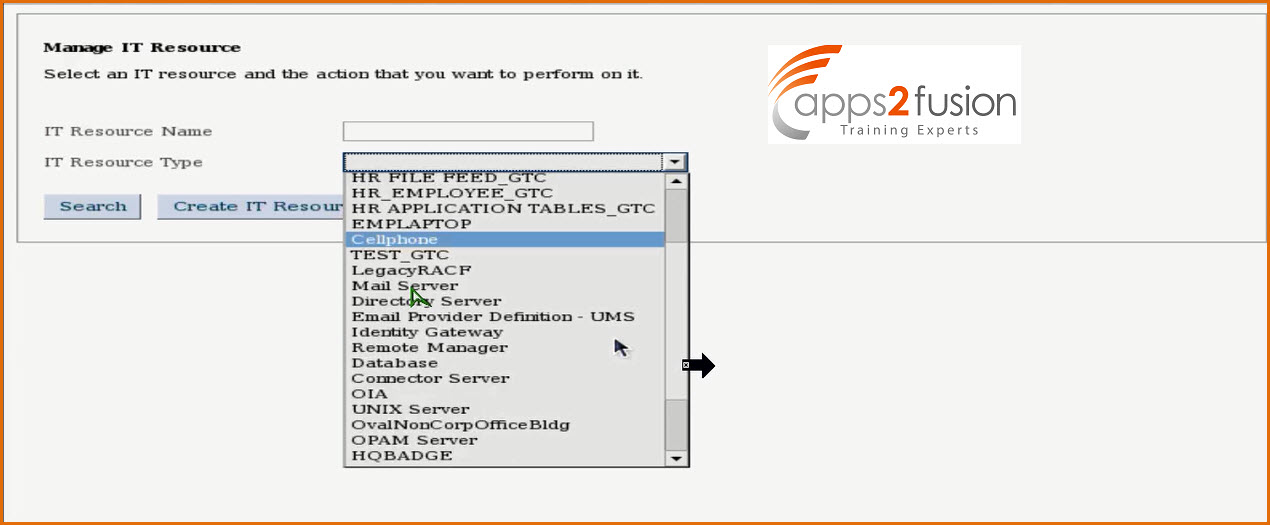
We wanted to select LDAP resource but its not available in the list . So if an resource is not available you need to install it using Generic Connector Jar file first . We have OUD installed on our machine , so we will download the connector for that . The connector I have downloaded is OID -11.1.1.5.0.zip .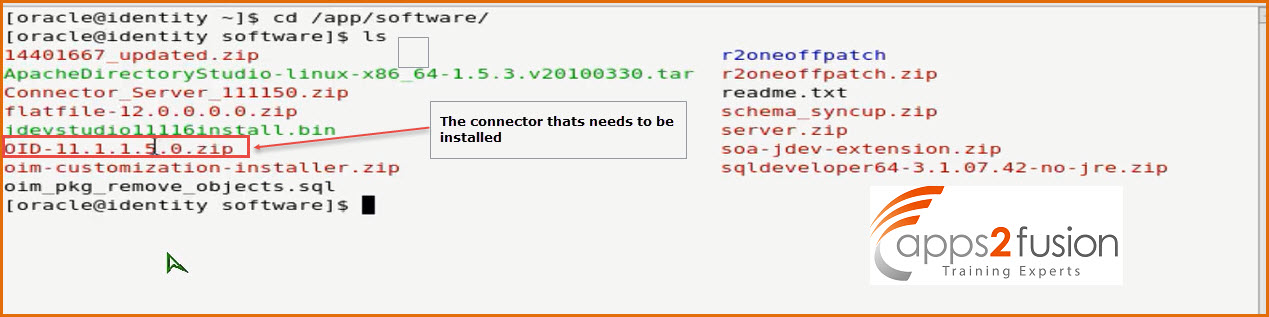
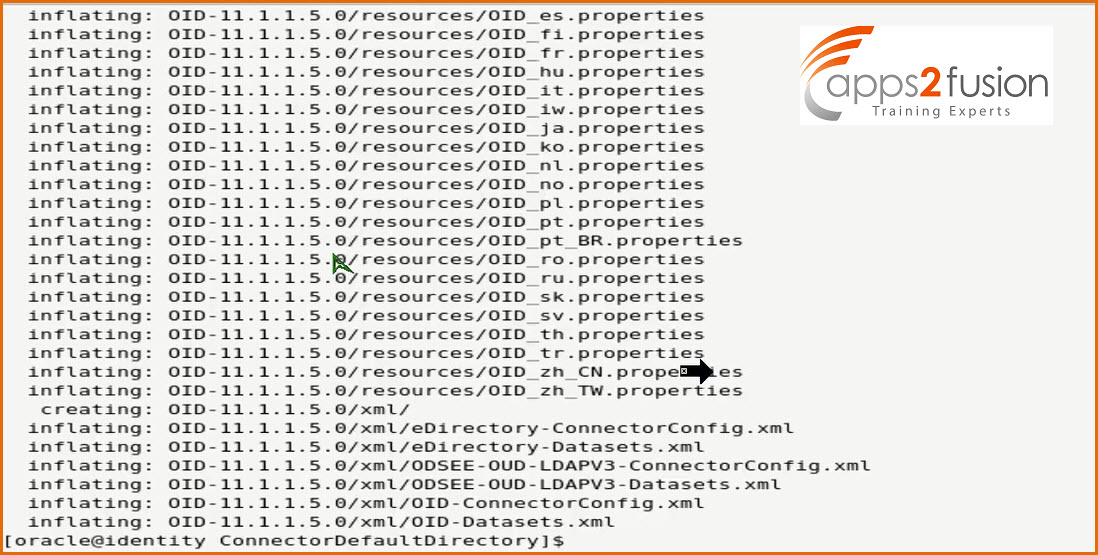
This is the OID connector bundle which can be used for so many products , it can be used with OID,OUD, ODSE etc .You need to extract the zip file in a specific location , this location would be IDM home , where IDM is installed .
Now to install the connector Click on System Management>Manage Connector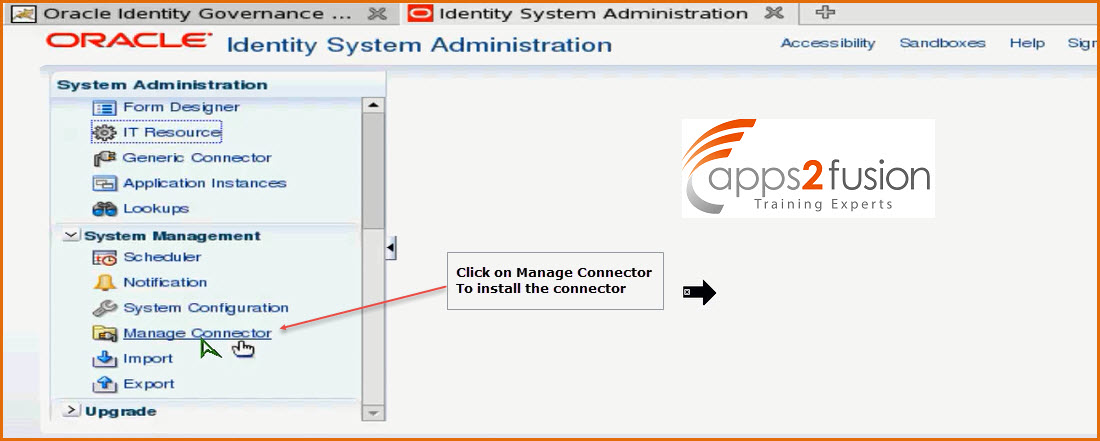
8.Click on Install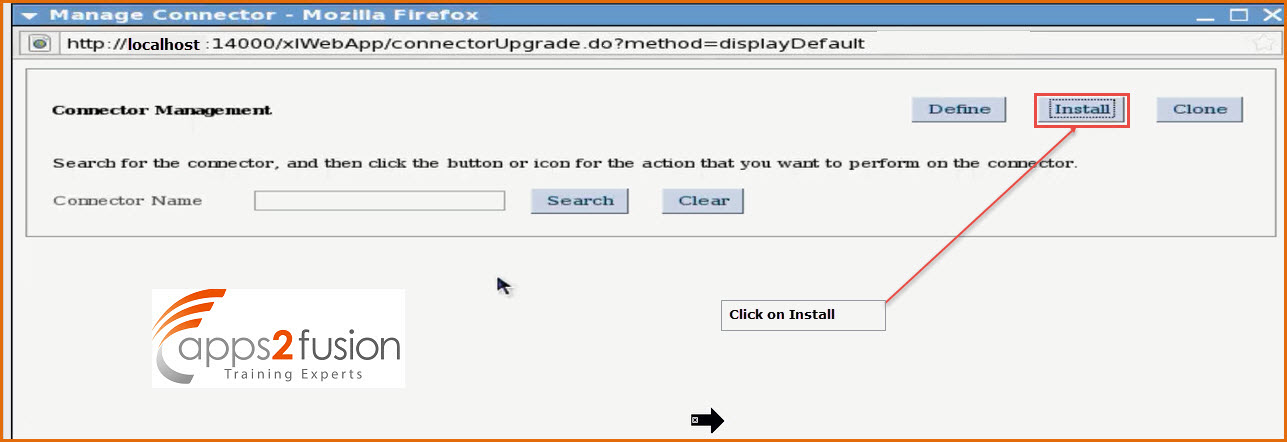
Select the OID Connector from Connector Lists and Click on Load 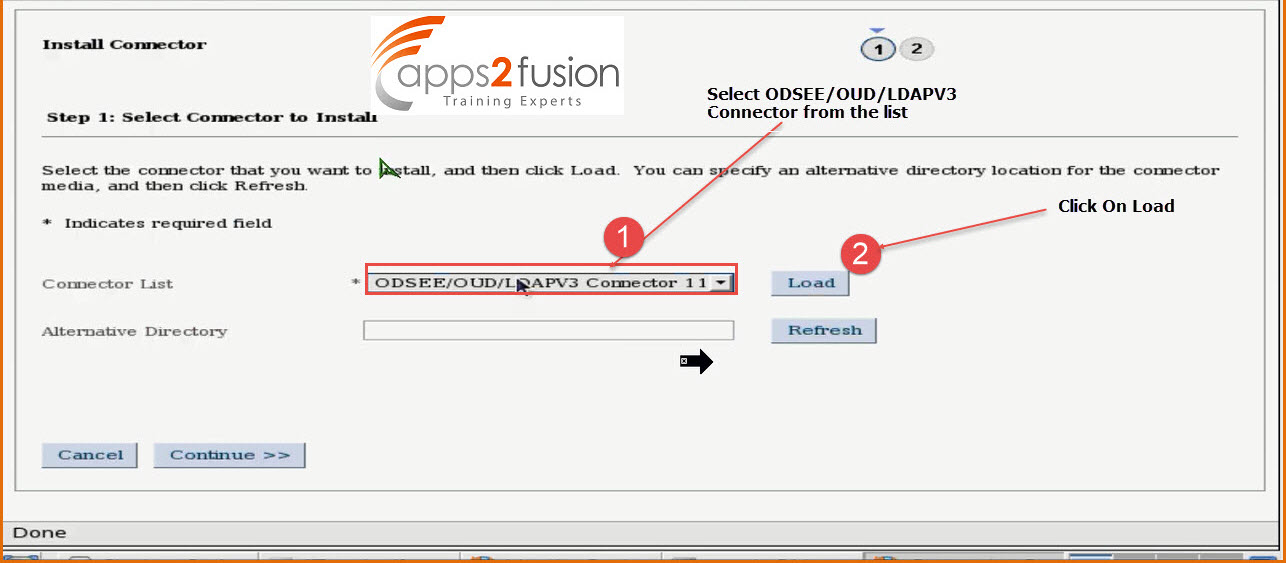
We could see these connectors only when we extract the OID zip file to DefaultConnectorDirectory folder.
Once the Connector is loaded Click on Continue 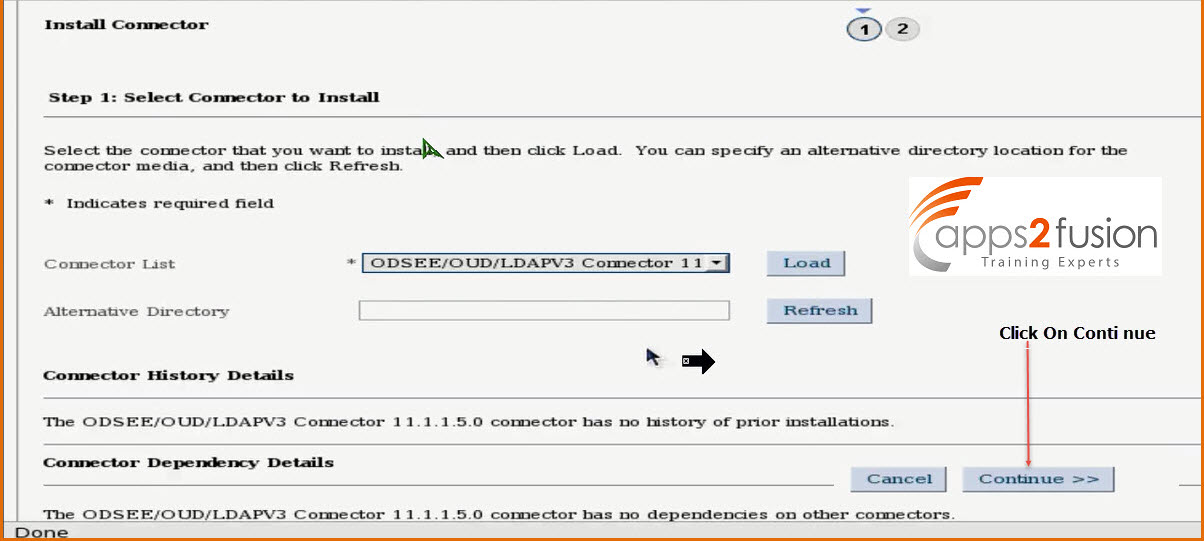
Installation will start after clicking on continue which will take 5 to 10 minutes . All configuration files which you have extracted to ConnectorDefaultFolder will loaded to OIM repository . OUD is already installed on the system , but OIM is not configured to provision OUD , so we are installing connector .So once the connector is installed it can communicate with OUD. You can have 10 to 15. OUD's instance on your system . For each insatnce you need to create one IT resource .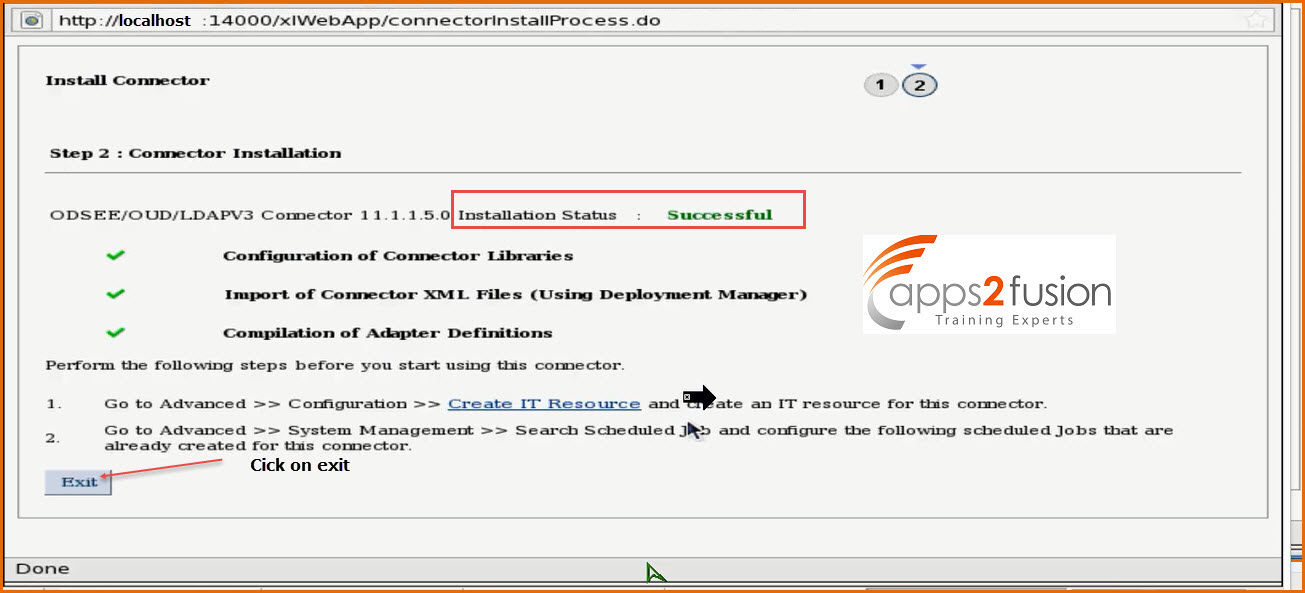
Once installation is succesfull click on Exit .
9.Steps to create IT Resource :
1.Click on Configuration>IT Resource
->Click on Create IT Resource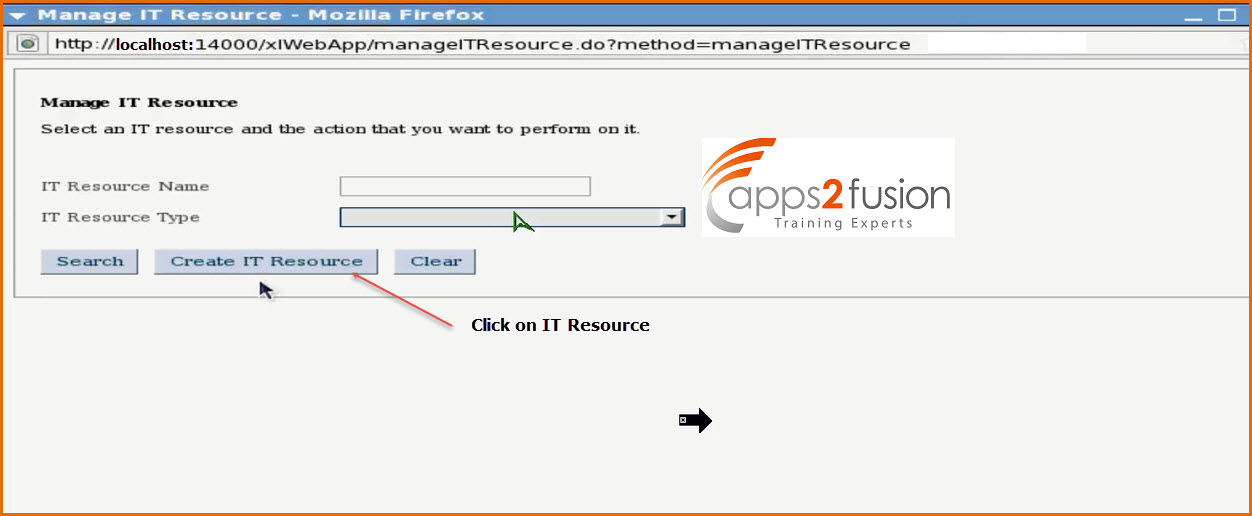
Now we should be able to see LDAP in IT Resource Type . So search for LDAP and select it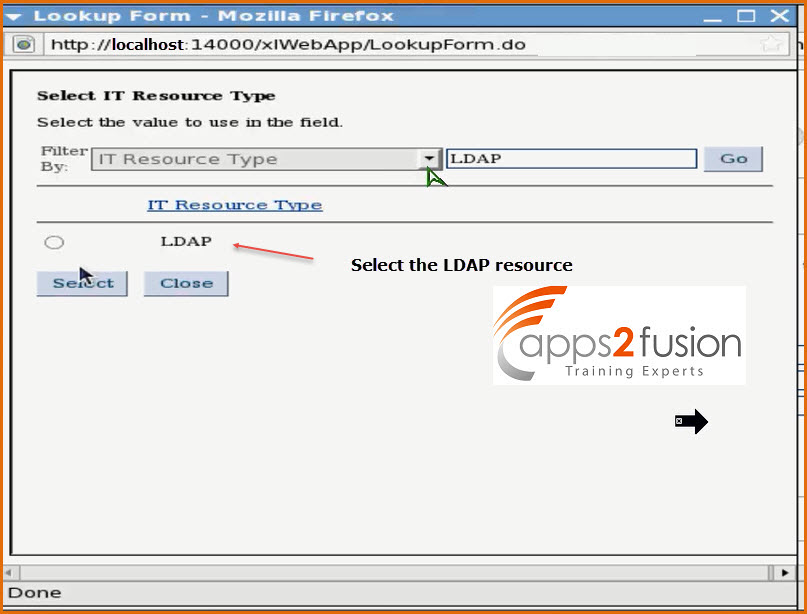
Name the Resource as OUD_ITR, and click on Continue 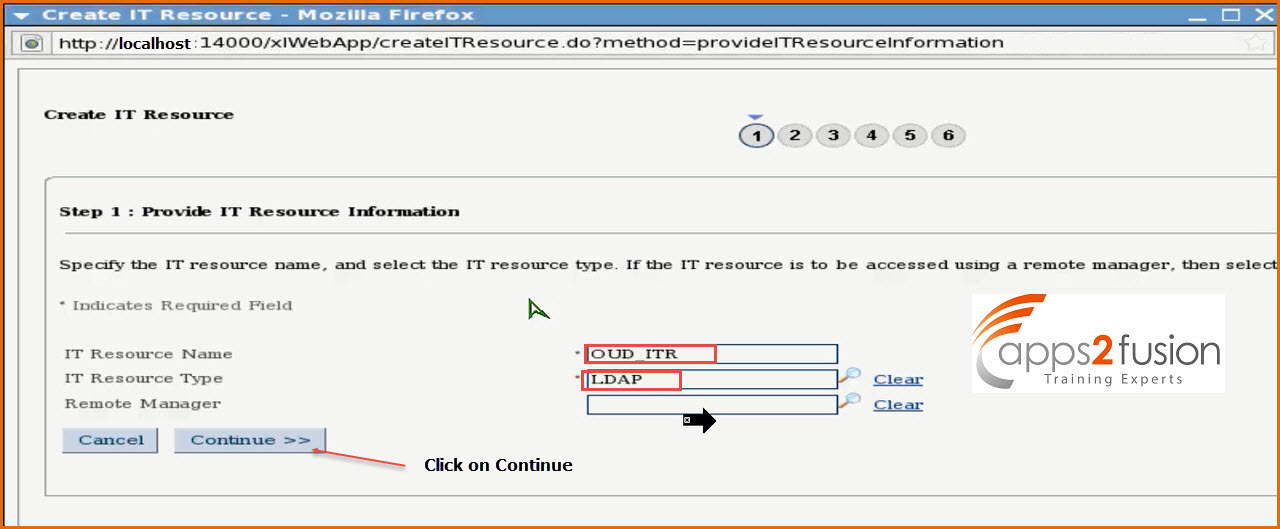
IT Resource Name :OUD_ITR
IT Resource Type : LDAP
Click on Continue .
2. Now it will ask you to Specify IT Resource Parameter Values :
Parameter Value
baseContexts "dc=example,dc=com"
Configuratioon Lookup Lookup.LDAP.OUD.Configuration
Connectoe Server Name Not required
credentials ********
failover not required
host localhost
port 2389
principal cn=Directory Manager
ssl false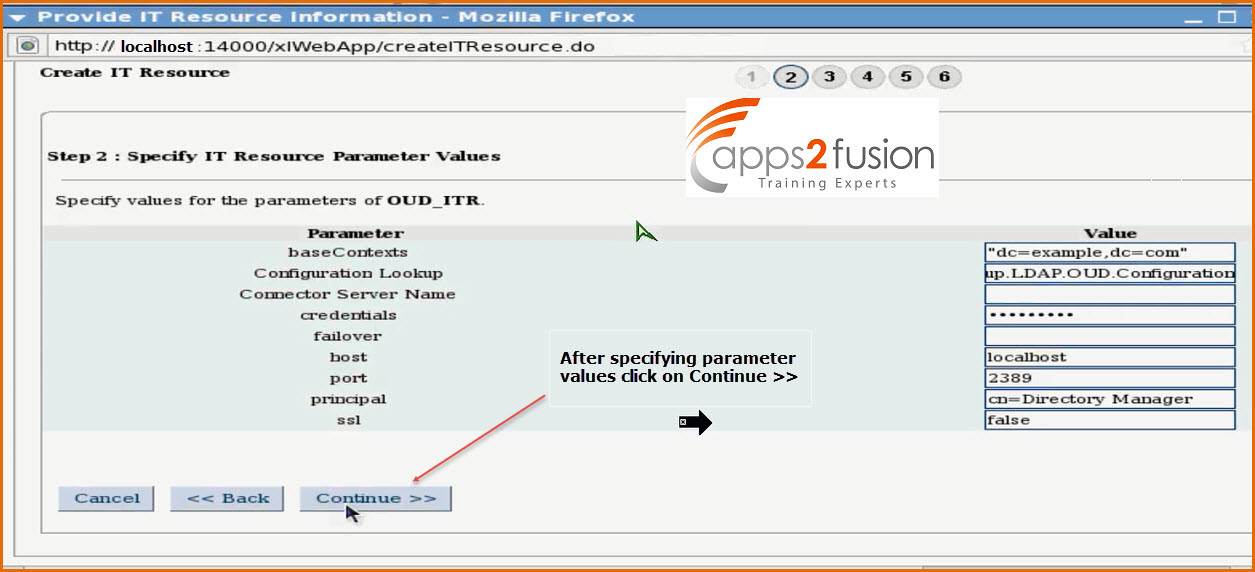
3.Set the acces permission to IT Resource and click on Continue . 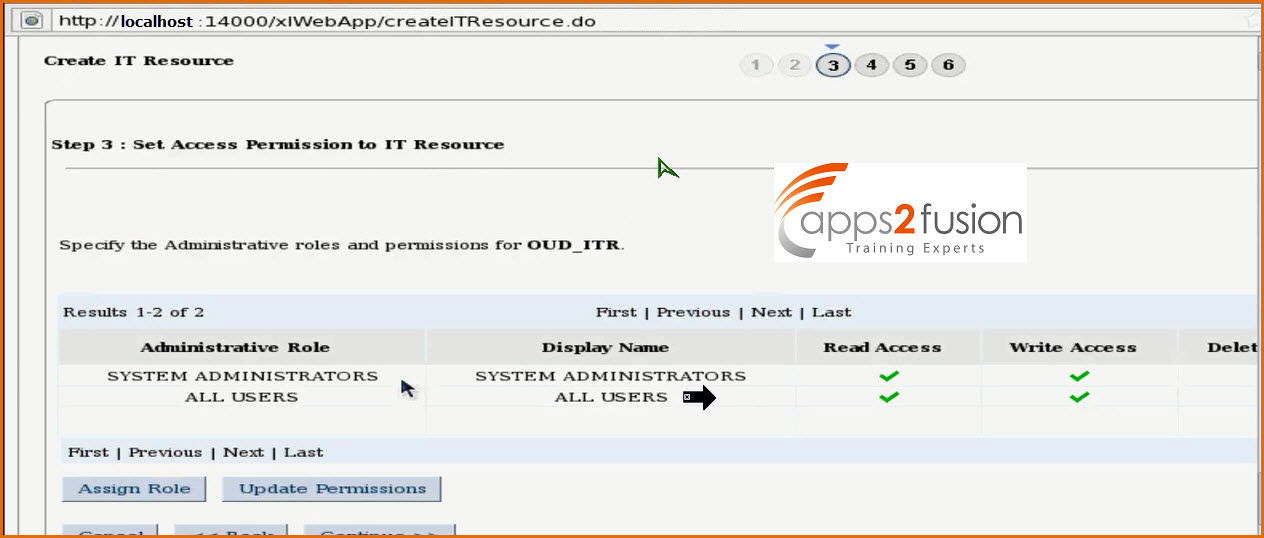
4. Verify IT Resource Details & Click on Continue 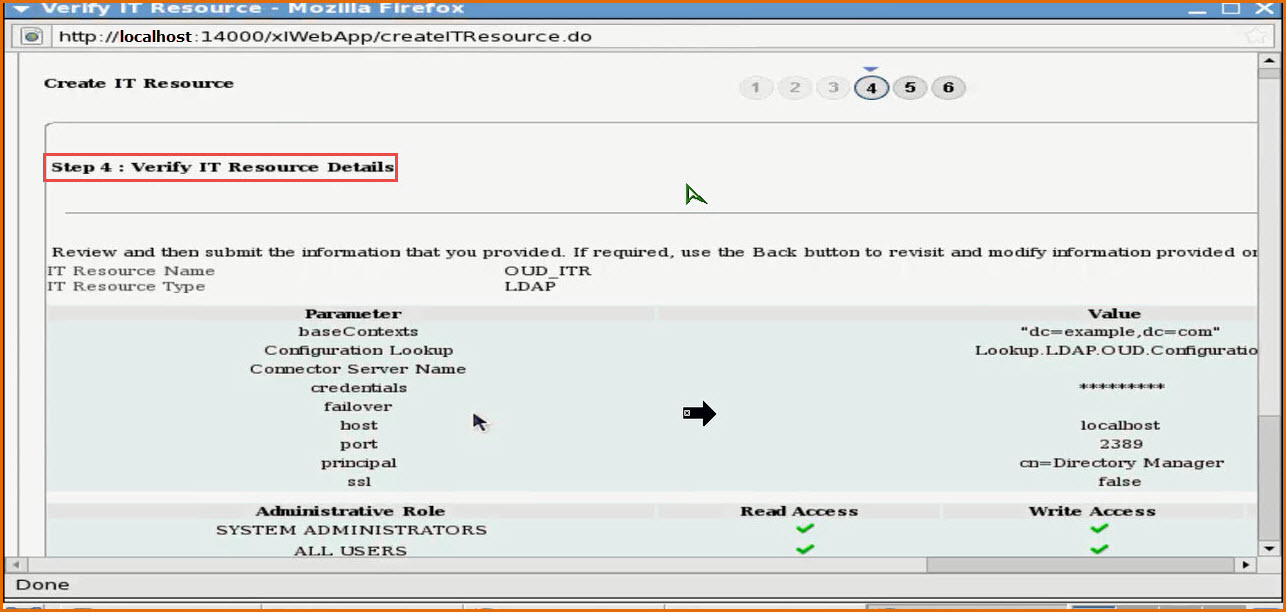
5. IT Resource Connection Result 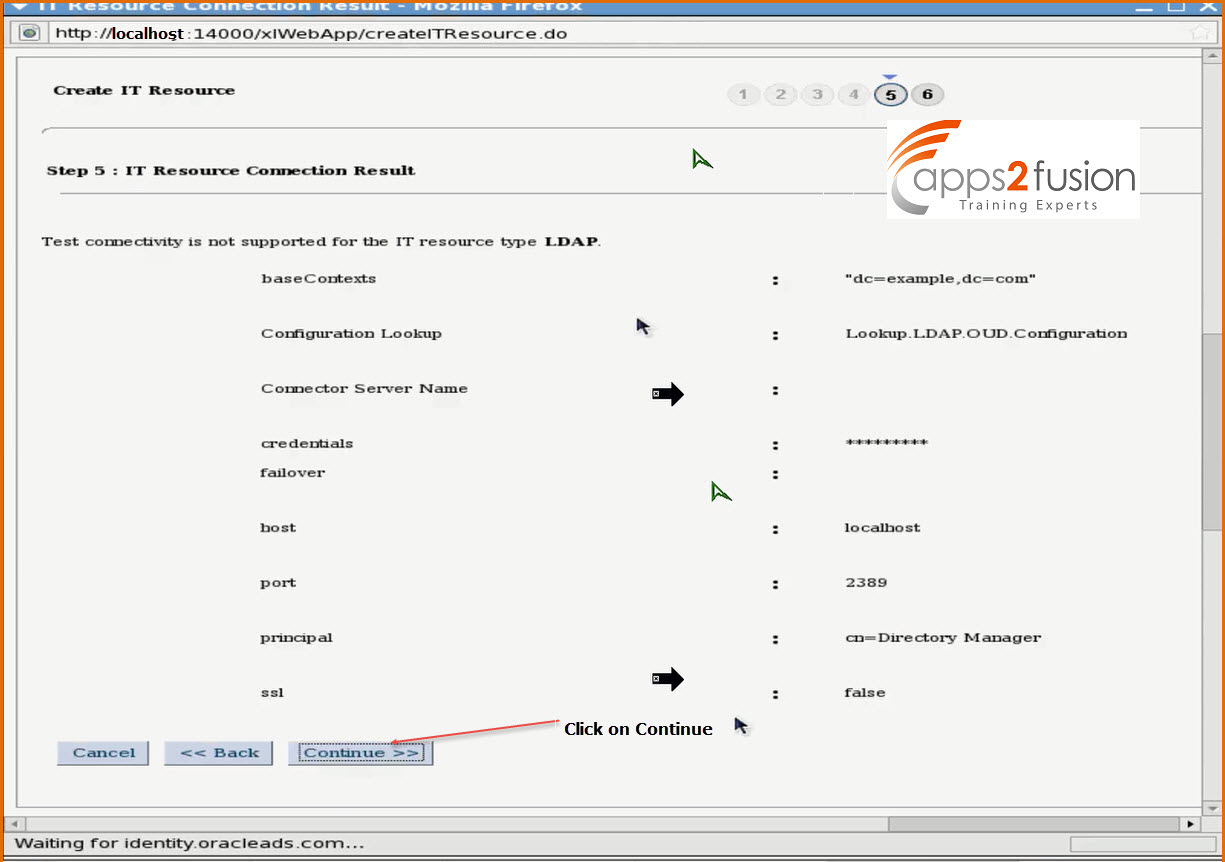
6. IT Resourcse will be created .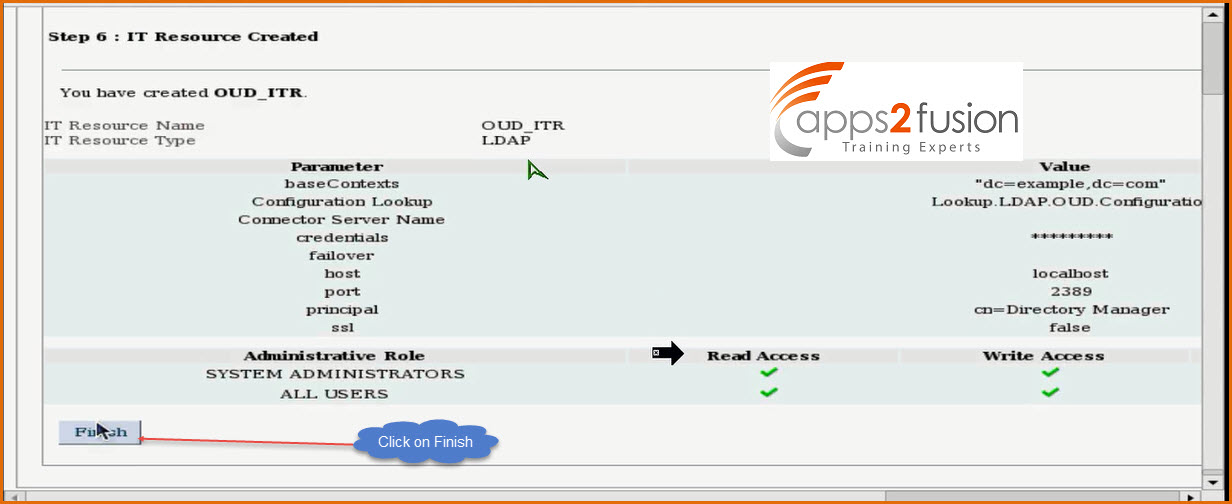
Now we have created IT Resource for the local OUD instance . To see how many accounts are there in OUD we will open Apache Directory studio
You will be able to see one OUD connection .Click on it 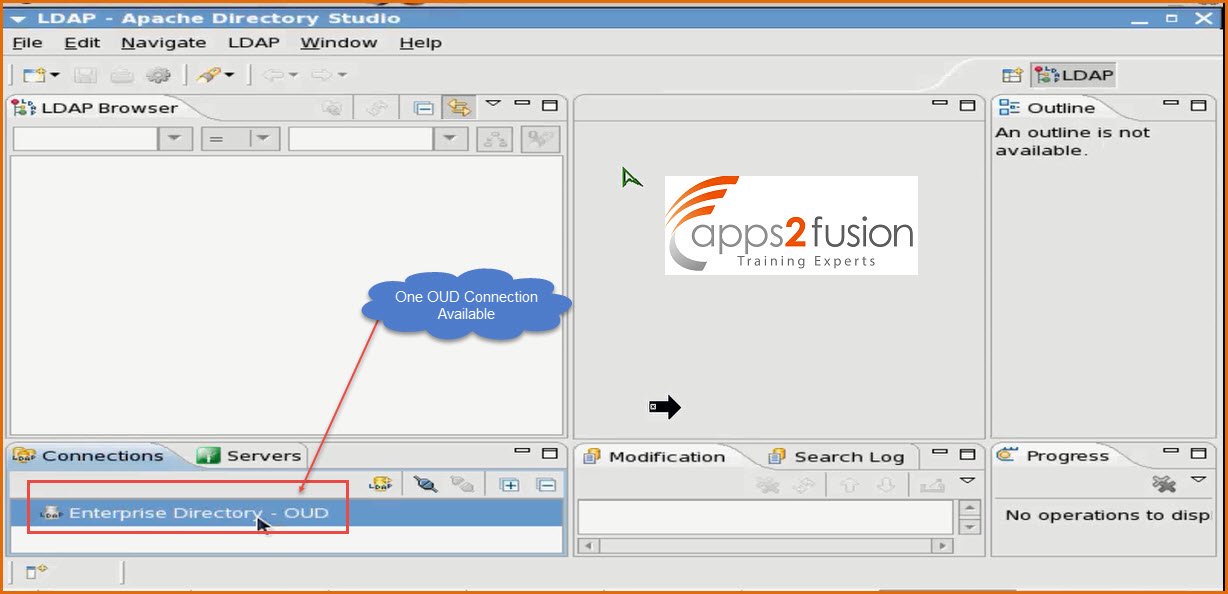
Click on Directory Information Tree(DIT)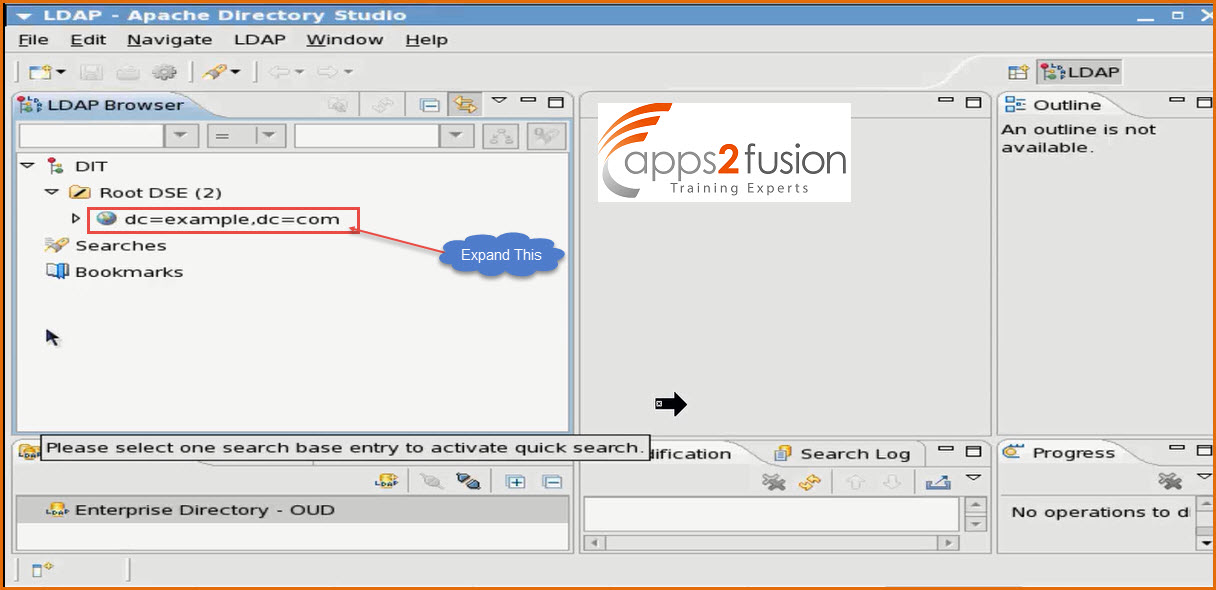
You will be able to see dc=example ,dc=com under DIT expand it
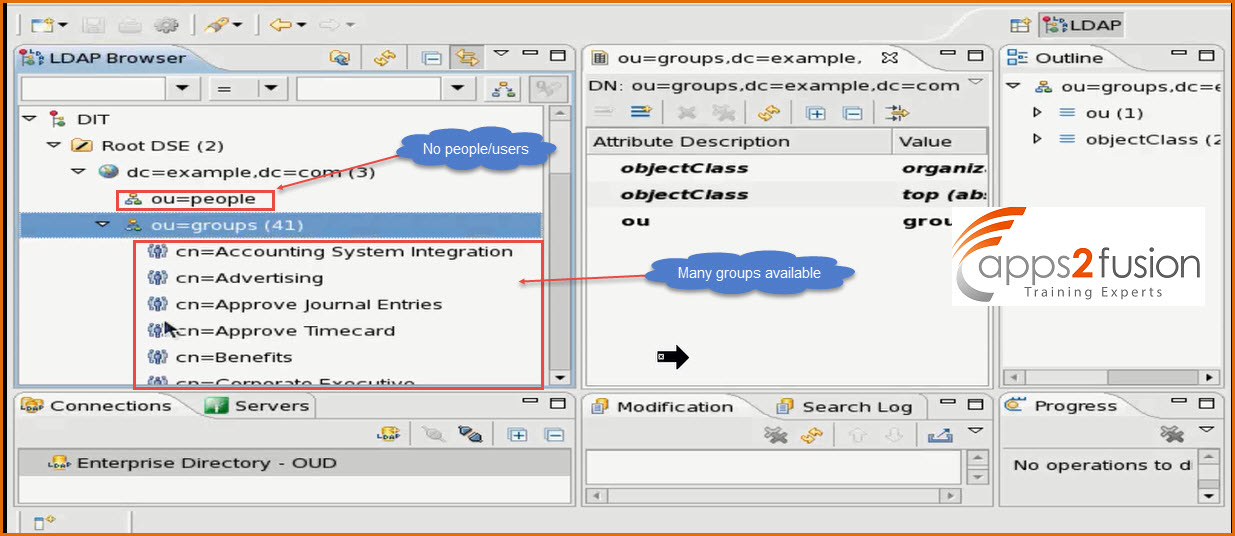
You will se that there are no users but there are 41 groups such as Accounting System Integration , Advertising etc . When you select a group you will see that there no members for the OUD group . So there are no users provisioned .


